To import external mailboxes or rather remote IMAP accounts, we offer a mailimport feature via konsoleH. To do this, first select your domain and then click on "Mailimport" under "Email".
Adding a mailbox to the mailimport
The following information is required for the mailimport:
- IMAP server: The remote IMAP server from which emails are initially retrieved.
- IMAP username: IMAP username. This is often the corresponding email address.
- IMAP password: IMAP password for this remote account
- Mailbox: This is the part before the @ sign. If you specify a mailbox that does not yet exist, it will be created.
- Mailbox password: This is the password for the mailbox. If the mailbox does not yet exist, the password you enter here will be set.
Please note the following password guidelines: The password must be at least 12 characters long and contain the following characters: at least one lowercase letter: "a-z", at least one uppercase letter "A-Z" and at least one number or one of the following special characters: "0-9!$%()=?+#-.,;:~*@[]_"
Adding a single mailbox to the mailimport
To add a single mailbox to the mail import, select the "Single Import" tab. Enter all the required information here:
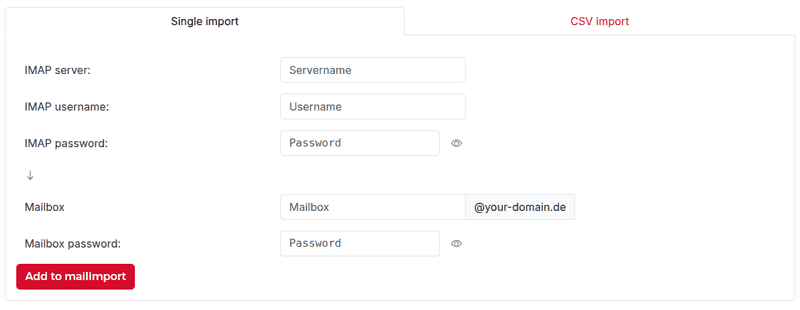
After you have entered all the data, click the "Add to mailimport" button.
Add multiple mailboxes to the mailimport
To add multiple mailboxes to the mailimport, click the "CSV import" tab and enter the data in a CSV file using the following format: IMAP server;IMAP username;IMAP password;Mailbox;Password
Please note that you must place the password in quotation marks ("") if your password contains a semicolon (;). For example:
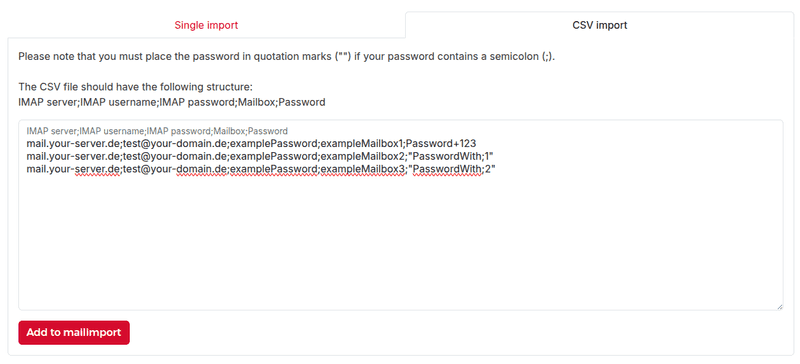
After you have entered all the data, click the "Add to mailimport" button.
Starting a mailimport
After that, the connections to the mailboxes are checked to prevent errors during the import.
If a connection error occurs, it must be resolved (the import settings can be adjusted using the pencil icon), or the import in question must be removed from the list using the trash can icon.
Further mailimports will then be checked.
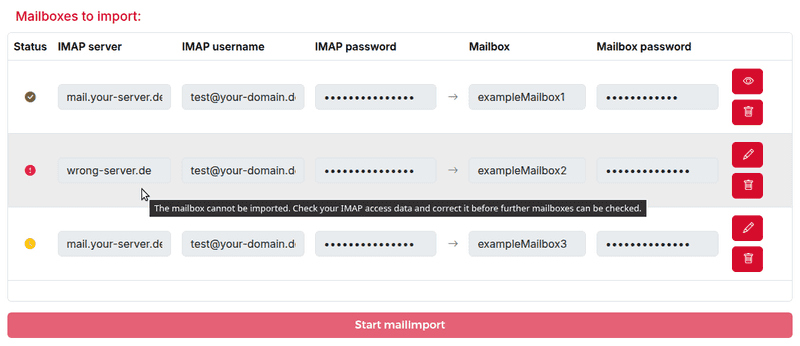 Once all mail imports have been verified, you can run the mailimport by clicking the "Start mailimport" button.
Current and past mailimports
Once you have started an email import, you will see a current overview of it. You can also view past mailimports under "Finished mailimports".