Introduction
Our technicians can attach a remote console to any of your Hetzner dedicated root servers. This remote console provides KVM (keyboard, video and mouse) over-IP functions and enables full control of the server. It is useful for troubleshooting a server, especially in cases where you can't use SSH. You can access the boot menu and fix network configuration errors. The console has virtual media support, so you can use it to install a custom operating system by mounting an ISO file.
A KVM Console is free for 3 hours. If you need it for a longer period of time, you can book it for 3 more hours for just € 8.40 ($ 10.00) (not including VAT).
We currently have 2 models of KVMs in use: Lantronix Spider and Raritan Dominion. Since we do have not every model in every datacenter we are not able to guarantee a certain model.
Ordering a KVM Console
Since the number of KVM Consoles in each DC is limited, we recommend that you order the KVM Console in advance.
Please request a KVM Console directly via Robot. To do so, log into Robot, go to Servers, select your server, and click on the Support tab. You will see a support form. Here, please select Remote Console. You can then choose if you want it immediately, or if you want to make an appointment for when you want it. You can also enter how long you want it, and you can write a note to our support team in the Comment area if you want to.
Please note that if you received a Raritan KVM you find the exact details here.
Logging in - Lantronix KVM
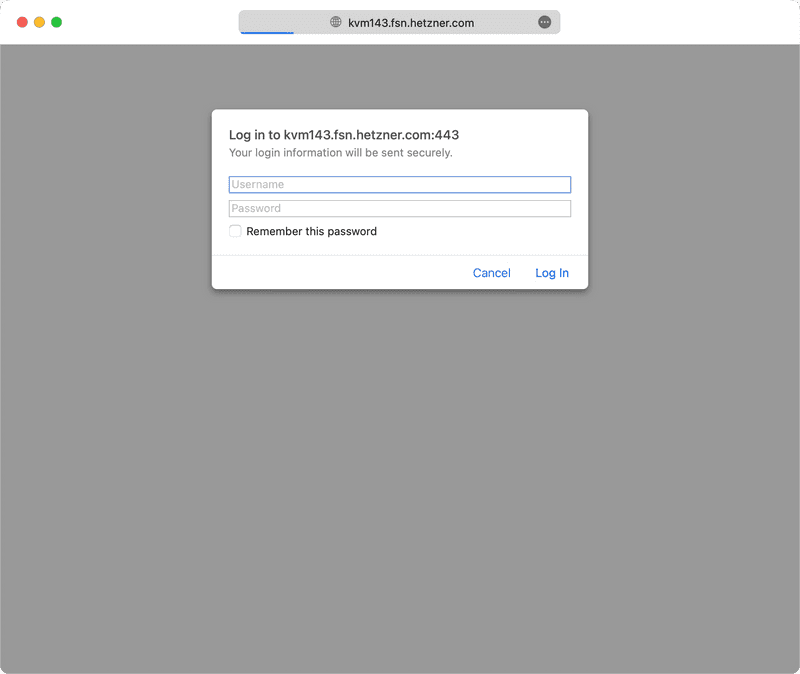
Once our technicians have connected a KVM Console to your server, they will send you an email with the login details, as well as the URL of the KVM Console. You can simply click on this URL, or you can copy and paste it into your browser. You will then see the following screen:
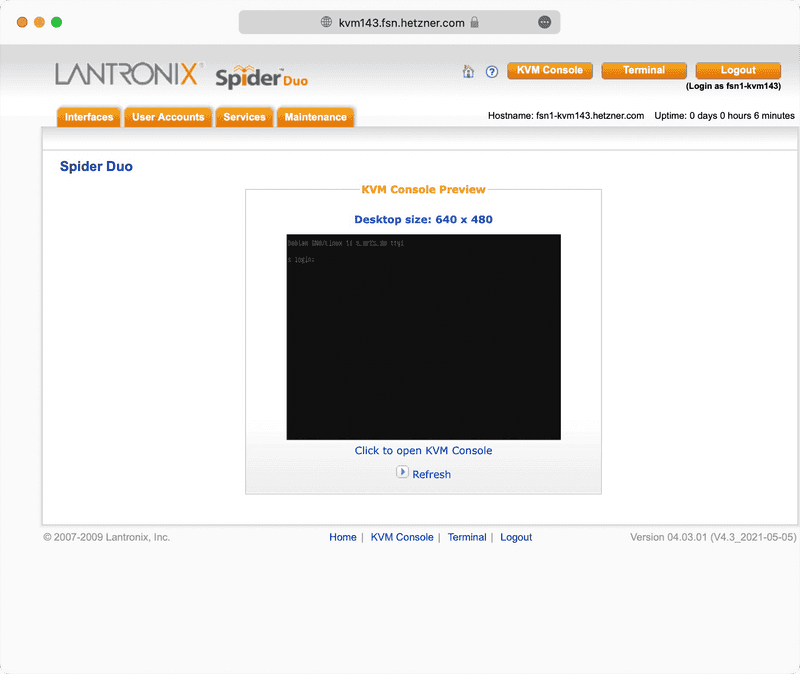
Once you have logged in with the login details from the email, you will see the following screen:
Using the KVM Console - Lantronix KVM
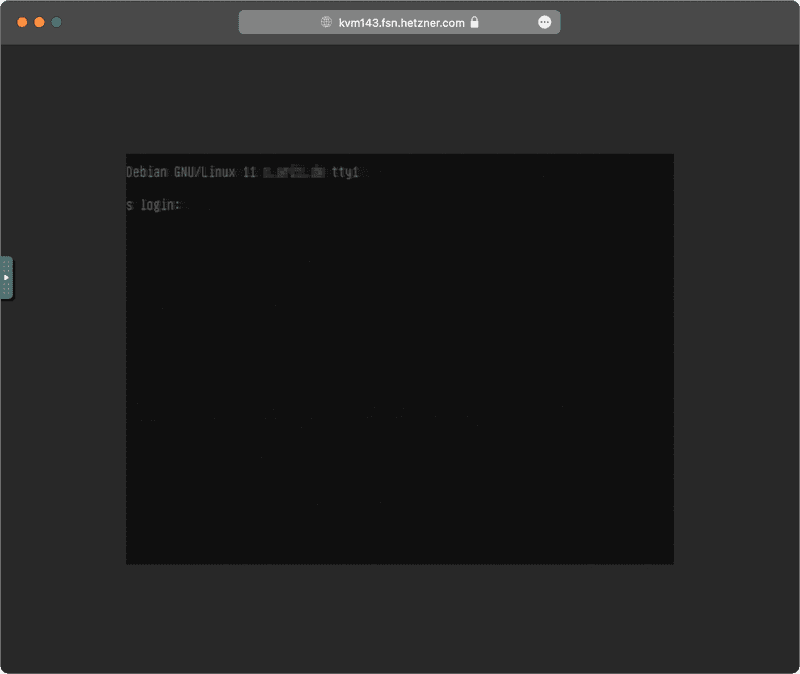
You can click on the Image in the center of the screen to open the web-based console. You should see the following screen:
Reboot - Lantronix KVM
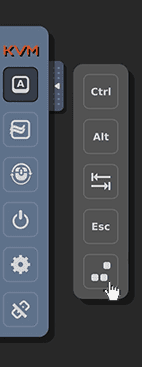
In the Menu bar at the left side of the screen you can find a macro/special key section that also includes Ctl+Alt+Del, which can be used to reboot linux based systems or unlock the windows lock screen.
Installing an OS - Lantronix KVM
You can use the KVM Console to install a custom OS. You can do this by mounting an ISO file or having our technicians create bootable USB stick from ISO for you.
Important time-saving note: If you want to install one of the standard Linux operating systems we provide, you can do this yourself and automatically via Robot by going to the Linux tab of the server. Or you can install it manually via our installimage or VNC installation.
Mounting an ISO file - Lantronix KVM
To access the virtual media interface, please click on the Interfaces tab, and then go to the Virtual Media link. Here, you can enter the details of the location of the ISO file.
Please note:
- The KVM Console only supports the mounting of ISO files via the SAMBA (SMB)/CIFS networking protocol.
- Mounting a file can take a significant amount of time, so please make sure you have a good connection to the location of the file. Unfortunately, there is no progress bar. You will see a notification once the file has been fully loaded.
- We cannot guarantee that mounting an ISO file and installing it will always work. For that reason, we offer the option of having our technicians create bootable USB stick from ISO for you.
Using our Mirror - Lantronix KVM
To help our clients install Windows, we provide a number of images of Windows operating systems.
You can find the images we provide on two of our mirrors:
- http://download.hetzner.com/ requires a username and password to login. You can find these login details at the end of the server activation email. This is the same email that contains the login details for the server itself.
- http://mirror.hetzner.com/ is only accessible from within the Hetzner network, and it does not require a password.
The following examples use the internal mirror, though a link to the external mirror is also mentioned. You can use the link to the external mirror to check the exact file names of the operating system images.
Windows
You can find the Windows images we have at http://download.hetzner.com/bootimages/windows/.
These Windows images are straight from Microsoft and don't include any changes from us. They do not come with a license. You can use them to install a clean Windows OS on the server, and you can then activate it with your own license key.
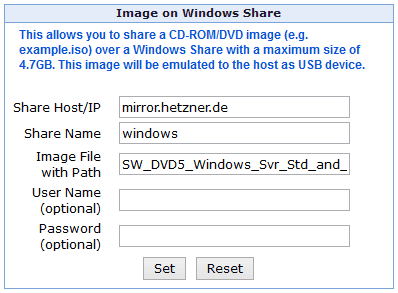
- You can copy the "Image File with Path" name directly from our mirror.
- You can leave the "User Name" and "Password" fields blank; you don't need them.
Using your own host - Lantronix KVM
The ISO file doesn't have to be hosted by us. You can host the ISO file wherever you want, as long as it is reachable via SAMBA/CIFS. This could be from another server at Hetzner, from a third-party server, or even from your own computer/server at your office/home.
Important note: This can take a long time, so please be patient as the image is being mounted/uploaded.
Using a USB stick - Lantronix KVM
If the options mentioned above for mounting an ISO file don't work or take too long, then there is always the option of asking our technicians to put the image onto a USB stick and attach that to the server along with the KVM Console.
Please send our technicians a link to the ISO file you have. When you order the KVM console, you can include a link to the ISO file in the "Comment" section of the support ticket. Or you can give our support team the link later when by responding to your support request for the KVM Console.
The ISO file does not necessarily have to be reachable via SAMBA/CIFS; it can simply be reachable via ftp for example, since our technicians will be connecting to it directly, and not via the KVM Console.
Booting the server - Lantronix KVM
Once the ISO file has been mounted/attached to the KVM Console, you will need to restart the server and boot from it. You can do this by using the KVM Console function of the KVM Console.
When booting the server, please enter the boot menu. On most motherboards, you can do this by pressing F11 during boot. Please note that some motherboards require a different function key, like F6 or F11, to enter the boot menu, so please keep an eye out for the appropriate prompt.
Once you are in the boot menu, select PepperC Virtual Disc 1 0.01 or UEFI:PepperC Virtual Disc 1 0.01 if you have mounted the file using the KVM Console. Or, if our technicians have connected a USB stick for you, then select the appropriate option to boot from that. JMicron Generic or UEFI:JMicron Generic are examples for an USB stick.
Installing the OS
Now you can simply follow the on-screen instructions to install the OS you have mounted/attached to the KVM Console.
Loading the installation files for Windows takes around a minute if you are using a USB, but can take longer, 10-15 minutes, via a mounted ISO file (via our mirror). If you have mounted the ISO file from somewhere else, then it can take even longer.
Logging in - Raritan KVM
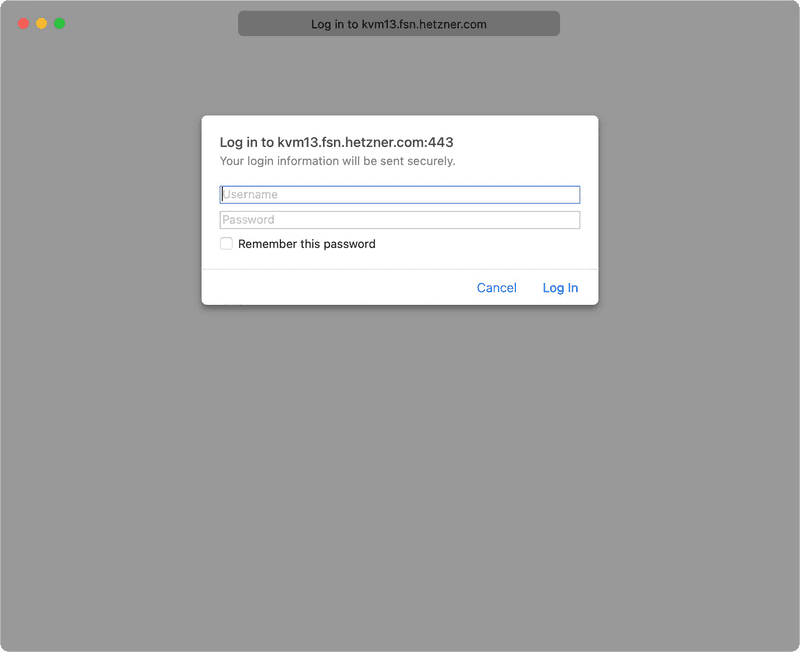
Once our technicians have connected a KVM Console to your server, they will send you an email with the login details, as well as the URL of the KVM Console. You can simply click on this URL, or you can copy and paste it into your browser. You will then see the following screen:
Using the KVM Console - Raritan KVM
Please click at the Button Connect so a new Window will appear. It may take some time to open up.
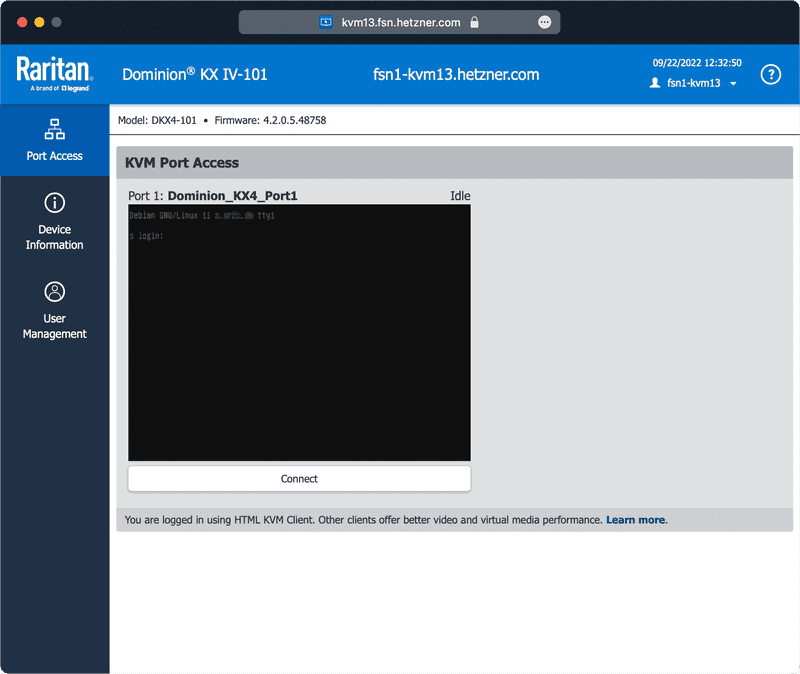
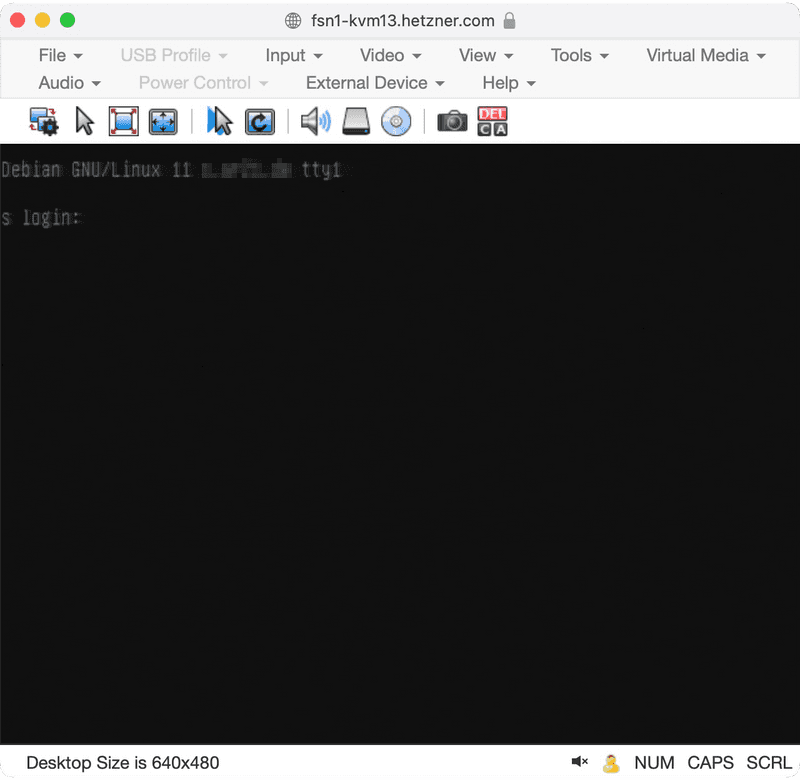
Once the Window has initiated, the console should open, and you will see the screen output of the server as though you were sitting right in front of the server itself.
Keyboard layout - Raritan KVM
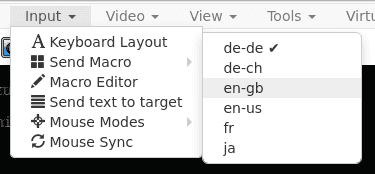
If the keys you are pressing on your own keyboard are not being accurately shown on the screen/console, then the keyboard layout is most likely incorrectly set. You can change this under the menu tab Input -> Keyboard Layout . There, you need to select the correct keyboard layout of the keyborad you are using.
Reboot - Raritan KVM
Via the confirm Ctrl+Alt+Delete button or Input -> Send Macro -> DEL + Crtl + Alt at the top left of the console, you can send the server a ctrl+alt+delete. You can use this to restart the server or to log into Windows.
Full screen mode - Raritan KVM
You can choose to have the console fill your screen if you want. Simply press the Fullscreen button (red framed) at the menu. You can leave full screen mod by pressing ESC.

Installing an OS - Raritan KVM
You can find this information here.
Mounting an ISO file - Raritan KVM
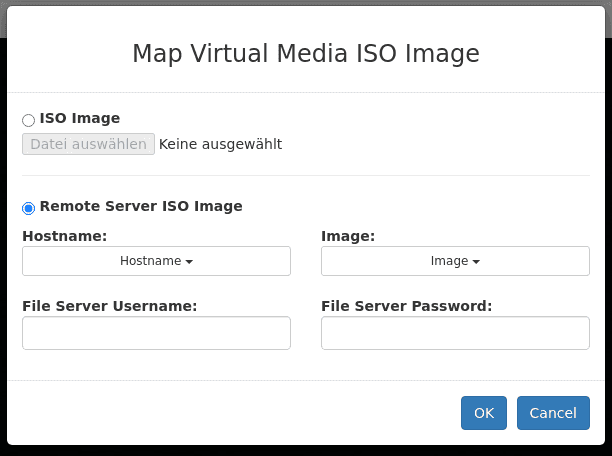
To access the virtual media function, please click on the Connect ISO button, and then click on the ISO Image (Browse...) button. Here, you can enter the details of the location of the ISO file.
Please note:
- Mounting a file can take a significant amount of time, so please make sure you have a good connection to the location of the file. Unfortunately, there is no progress bar. You will see a notification once the file has been fully loaded.
- We cannot guarantee that mounting an ISO file and installing it will always work. For that reason, we offer the option of having our technicians create bootable USB stick from ISO for you.
Using our Mirror - Raritan KVM
You can find this information here.
Booting the server - Raritan KVM
Once the ISO file has been mounted/attached to the KVM Console, you will need to restart the server and boot from it. You can do this by using the KVM Console function of the KVM Console.
When booting the server, please enter the boot menu. On most motherboards, you can do this by pressing F11 during boot. Please note that some motherboards require a different function key, like F6 or F11, to enter the boot menu, so please keep an eye out for the appropriate prompt.
Once you are in the boot menu, select Raritan Virtual CD / DISK or UEFI: Raritan Vitrual CD if you have mounted the file using the KVM Console. Or, if our technicians have connected a USB stick for you, then select the appropriate option to boot from that. JMicron Generic or UEFI:JMicron Generic are examples for a USB stick.