Because of their scalability and high-availability, Buckets are a great option for storing backups.
Veeam Backup & Replication is a comprehensive data protection solution that supports seamless integration with S3-compatible storage providers. For more information about Veeam, see:
You need a valid Enterprise edition license. You cannot use object storage with the Community Edition.
Also note the following limitation from the official Veeam documentation:
Data in an object storage bucket or container must be managed solely by Veeam Backup & Replication, including retention (in case you enable Object Lock and Versioning features on an S3 bucket [...]) and data management. Enabling lifecycle rules is not supported, and may result in backup and restore failures.
If you want to enable Object Lock and Versioning, see the how-to guides on Legal Hold, Retention, and Versioning.
Prerequisites:
- Veeam is already installed
-
Create your credentials
For a step-by-step guide, see the getting started article "Generating S3 credentials".
Make sure you save the credentials in a safe location right after you create them. You cannot view the secret key again, neither via Hetzner Console nor via API.
-
Add new cloud credentials
-
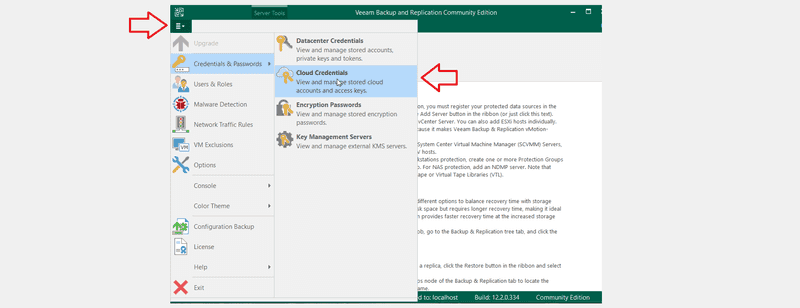
Click on the menu icon in the top left
-
Navigate to "Credentials & Passwords" and select "Cloud Credentials"
-
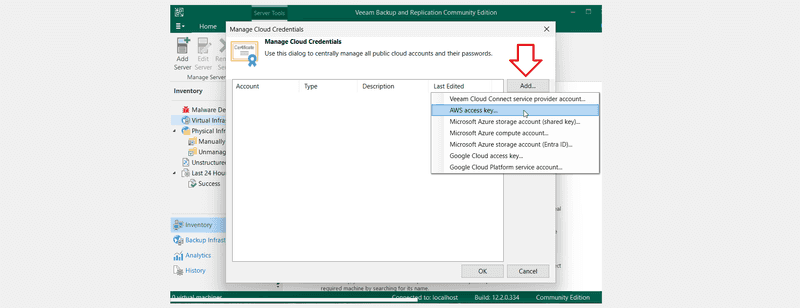
Click on "Add" and select "AWS access key..."
-
Add your access key and your secret key, and add a description, e.g.
s3-hetzner-keys. -
After the key was saved, you can click on "OK" to close the "Manage Cloud Credentials" window.
-
-
Create a new repository
-
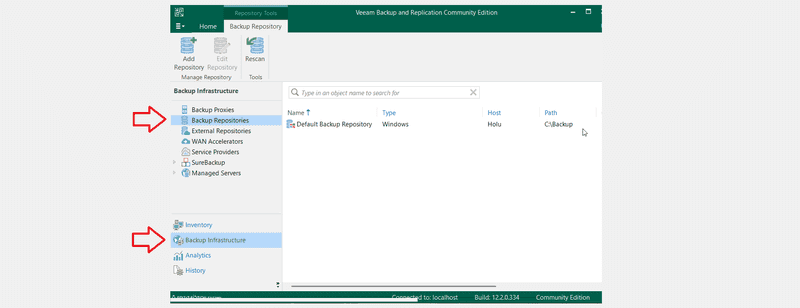
Go to "Backup Infrastructure" and select "Backup Repositories"
-
Click on "Add Repository" in the top left and:
- Select "Object Storage"
- Select "S3 Compatible"
- Select "S3 Compatible" again
- Enter a name for the repository, e.g.
s3-hetzner-bucket.
To avoid issues, setLimit concurrent tasks to:to 2. - Switch to "Account".
Change the connection mode fromDirecttoThrough a gateway serverand select the device that has Veeam Backup & Replication installed as gateway.
For the credentials, you can open the drop down and select the credentials you just created, e.g.s3-hetzner-keys. It should look like this:Service point: https://fsn1.your-objectstorage.com Region: fsn1 Credentials: <your_access_key> (s3-hetzner-keys, last edited: less than a day ago) - Switch to "Bucket". When you click "Browse..." next to the Bucket name, it should give you a list of all Buckets that are available via the endpoint and the S3 credentials you provided. Select one of the Buckets. Next, browse for folders. Click on "New Folder" and give it a name.
-
Once you're satisfied with all the settings, click "Apply" and wait until it completed.
-
In the "Summary", it should state "Object storage repository was successfully created."
-
Finally, click on "Finish"
In the repository overview, you should now see a new repository that is connected to your Hetzner Bucket:
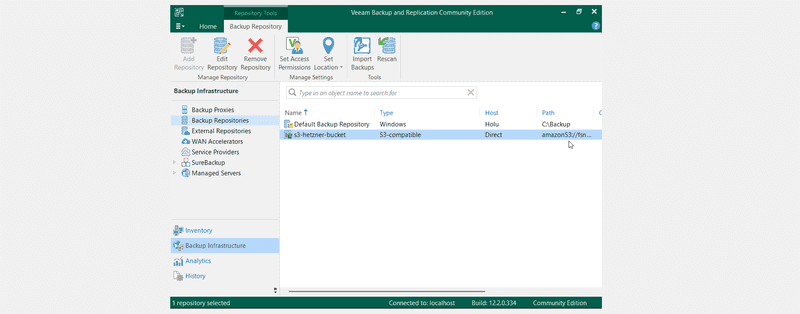
Right-click on the repository and select "Access permissions...". Make sure the permissions match your requirements.
-
-
Create backups
Before you create a backup job, make sure you already added something to backup, e.g. a computer or file share.
Go to "Home" » "Backup Job" and select the respective option.
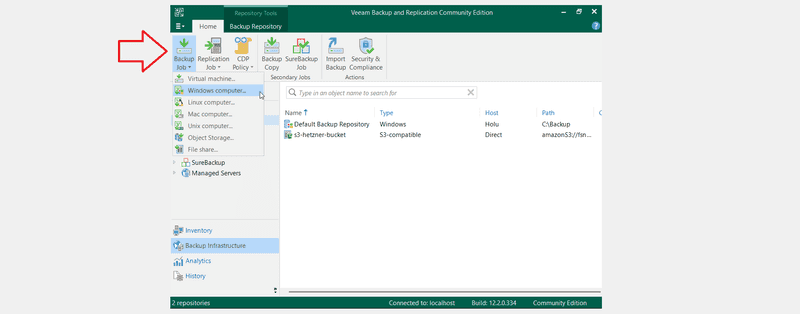
In "Storage", select the repository that is linked to your Bucket, e.g.
s3-hetzner-bucket.
-
Setup registry keys
On the device that has Veeam Backup & Replication installed, add three new registry keys of type REG_DWORD:
Value name Value data Base S3RequestTimeoutSec 900 Decimal S3RequestRetryTotalTimeoutSec 9000 Decimal S3ConcurrentTaskLimit 8 Decimal To add those keys, follow these steps:
-
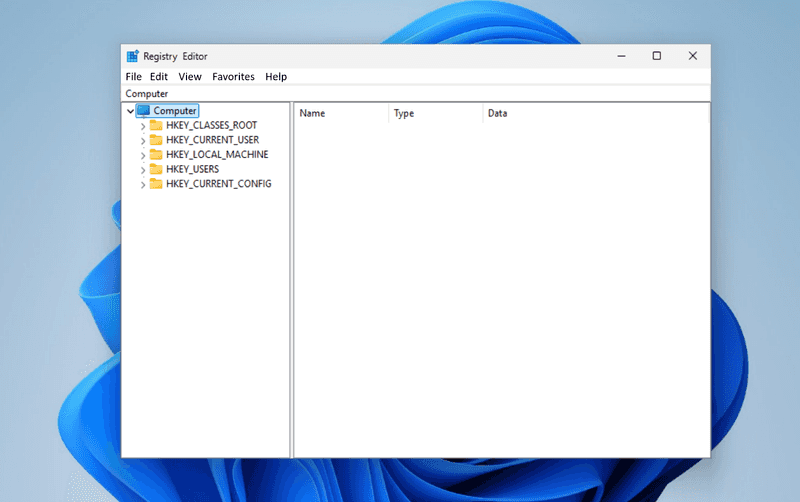
In the Windows search bar, search for and open "Registry Editor". A window should open that looks like this:
-
Navigate to this directory:
HKEY_LOCAL_MACHINE\SOFTWARE\Veeam\Veeam Backup and Replication\ -
In the "Veeam Backup and Replication" directory, create a new registry key:
Edit»New»DWORD (32-bit) Value -
Give it one of the value names from the table above, e.g.
S3RequestTimeoutSec. -
Double click the new key. A new window should pop up. Select "Decimal" and enter the respective value data as defined in the table above.
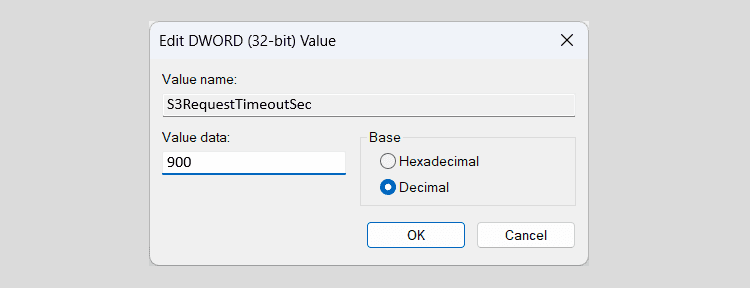
After you added all three keys, you can close the registry editor.
-
Your data should now be backed up automatically.