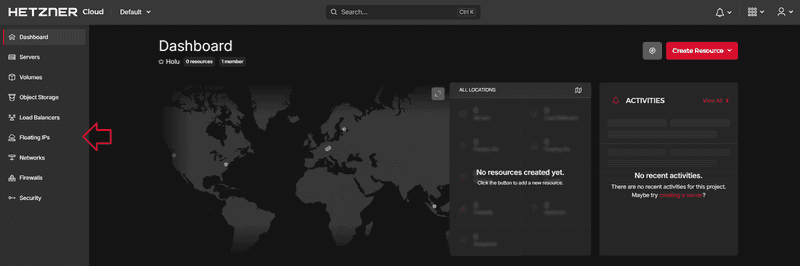
To create a new Floating IP on your Cloud Console, please open your project and do the following:
-
Go to Floating IPs on the left menu bar
-
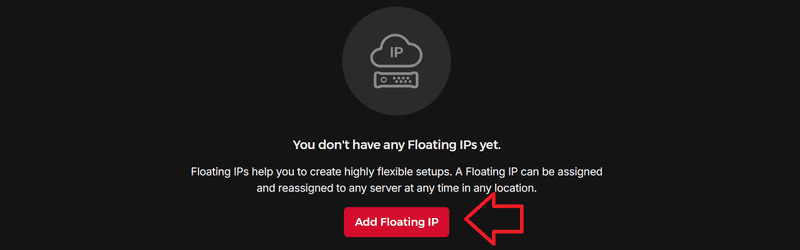
Select Add Floating IP
-
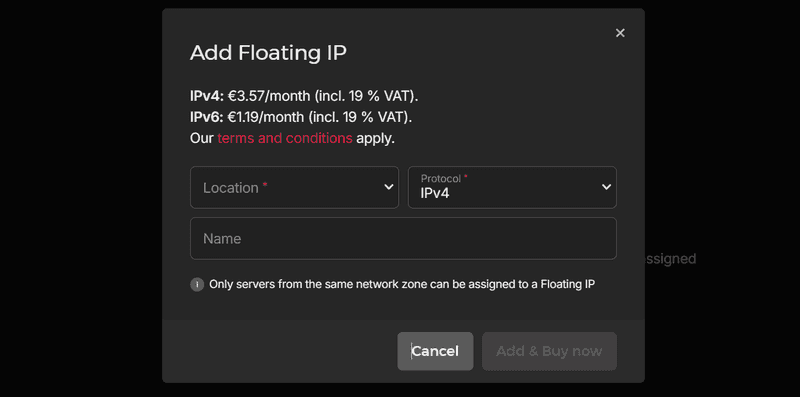
Create your Floating IP
-
Choose a location. Routing will be optimized for that location.
-
Choose a protocol. You can choose between IPv4 and IPv6.
-
Enter a name for your Floating IP in the lower text box. Please note that it is not possible to use names more than once per project.
-
-
Now that your Floating IP has been created, you can assign it to a server

Hover over Unassigned and click on the arrow to choose a server.
-
Configure Floating IP
A window will pop up right after the server has been assigned to your Floating IP. You will be shown a command that you can use to configure your Floating IP temporarily.
You can unassign and reassign your Floating IP at any time.
Please note: Floating IPs can only be assigned to one server at a time. In order to assign a new server to the Floating IP, you have to unassign the old server first.
Next: