Cloud servers are virtual machines that run on physical servers and are used to run an operating system and computer programs. See full server overview.
To create a new server on your Hetzner Console, please open your project and do the following:
-
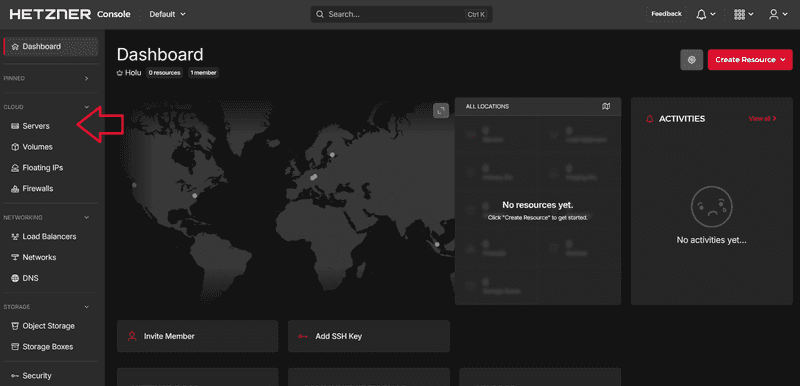
Go to Servers on the left menu bar
-
Select Add server

-
Create your server
You can customize your server with the following features:
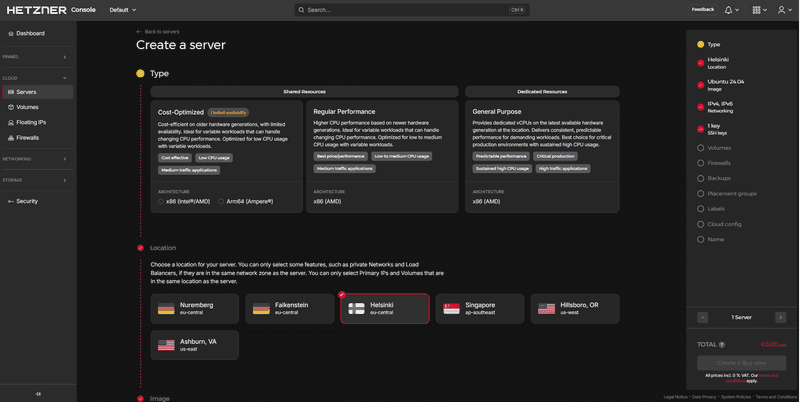
○ Type
Choose a server plan that fits your needs best. You will be able to change the performance at any time via the "Rescale" option.○ Location
This is where your server will be located. For smaller projects you can choose any location you prefer. For bigger projects we recommend choosing the closest location.○ Image
OS Images
This will be your operating system. It is possible to change this setting after the server was created, but all previous data on the disk will be lost. After the server was created, you can also choose to attach an ISO image or even a custom ISO image to the virtual drive of your server (see "How can I get a custom ISO?"). Snapshots
If you have a Snapshot, you can use it to create a new server. The new server will be a duplicate of your Snapshot. Apps
If you select an app, certain software will be preinstalled on your server.○ Networking
Select which types of IPs the server should include or not. In total, you can choose from three network options: ● Two public IP addresses (IPv4andIPv6)
The server has a public network and supports public IPv4 / IPv6 connections.
● One public IP address (IPv4orIPv6)
The server has a public network, but only supports either public IPv4 or IPv6 connection (see "Connecting to a server via its IPv6").
● No public IP addresses
The server does not have a public network. Instead, it only is accessible with a private IP address and it has to be added to a private network (see "Connecting to a Server via its private IP").
IPv4 / IPv6
If you select a public IP and you already have an unassigned Primary IP, you can select it to assign it to your server at server creation. You can only assign Primary IPs that are in the same project as the server, have the same location as the server, and are not yet assigned to a different server.
If you select a public IP and don't have an unassigned Primary IP that you want to use, a new Primary IP will automatically be created for you and will be added to your project when you create the server. Private Networks
Servers use Networks to communicate directly with each other. For servers that have at least one Primary IP, adding it to a Network is optional.
If you would like to disable the public network of your server, you will first have to add it to a private Network. After your server was added to the Network, you will be able to remove both public IPs.○ SSH key
The SSH key is used for authentication on the server. After the server has been created, it is no longer possible to add an SSH key via the Hetzner Console. However, you can still add one via a CLI as described in this tutorial, for example.○ Volumes
Volumes are used to extend the storage space of your server. The tutorial "Storing data on a block storage device" at community.hetzner.com explains step by step how to store data on the Volume.○ Firewalls
Firewalls are used to restrict traffic based on rules.○ Backups
Backups are daily automatic copies of the server's disk. Each server has a total of seven Backup slots.○ Placement Groups
Placement Groups allow you to influence the distribution of virtual servers in our data centers. We currently offer one type, which is Spread. With this type, all virtual servers run on different physical servers.○ Labels
You can use labels to filter your servers, and to apply your servers to a Firewall, or to add them as Load Balancer targets.
Labels are key/value pairs, with "value" being optional. This means you can choose yourself if you want your server to have a simple label that only consists of the key part, or a complete key value pair. To create pairs, enter the key part and then use theenterkey or the equals sign ("key=value") to switch to the value part. Both key and value must be 63 characters or less, beginning and ending with an alphanumeric character and alphanumerics can be used inbetween. You can copy & paste several labels at the same time by separating them by comma or with a space.
Example:
If you copy & paste this text to the label box:You will get these labels:env=production,type=database,project2
env production , type database , project2○ Cloud config
Cloud-init helps with early initialization of a cloud server. It is a software used to process and execute scripts. Here, you can upload those scripts if needed. Please note that this field is limited to 32KiB.
○ Name
This will be the name of your server. Please note that it is not possible to use names more than once per project. Unique names are needed to clearly identify the corresponding server so that the name can be used in place of an IP address in commands. Additionally, the name has to be valid as per RFC 1123. Please refer to the section 2.1 Host Names and Numbers. This will give you more information about any changes to the syntax of a hostname specified in RFC 952 in the section ASSUMPTIONS. Some of the rules include:-
You can use the alphabet (A-Z), digits (0-9), minus sign (-), period (.)
-
No blank or space characters
-
No distinction between upper and lower case
-
The first character must be an alpha character or a digit
-
The last character must not be a minus sign or period
-
Single character names are not allowed
-
If you are happy with your settings, click on CREATE & BUY NOW to create the new server.
Next: