You can attach an ISO image to the virtual drive of your server via Hetzner Console and API.
- Doing a manual installation via ISO will cause some trouble with the automatic configuration via DHCP.
You will therefore have to configure the default gateway yourself. - Doing a manual configuration via an installer is not possible.
This guide explains how to set up the default gateway manually:
Prerequisites:
-
The new ISO image must have been mounted
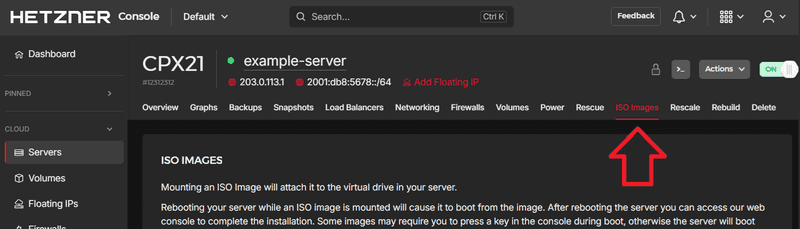
To mount an image via the Hetzner Console, select "ISO Images" in your server menu.
-
You must have performed a restart on your server
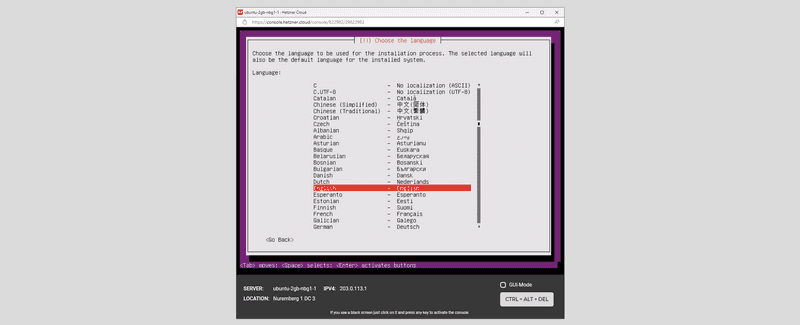
After the server's restart, you have to complete the image installation via the console on Hetzner Console. You can open the console on the top right of your server overview.

With Ubuntu, you can just wait for the installer to boot.
With Debian, wait for the GRUB menu that appears after reboot. If "Graphical install" is highlighted as the default option, hit the tab key
↹and edit the boot options.- Change the value of vga from "788" to "normal":
vga=normal - Add
fb=false
It should now look similar to this, and you can hit enter to boot into the installer:
/install.amd/vmlinuz vga=normal fb=false initrd=/install.amd/gtk/initrd.gz --- quiet - Change the value of vga from "788" to "normal":
Configuring the default gateway
If you're using Ubuntu 20.04 (or newer) or Debian 9 (or newer), the interface name is ens3.
During the installation
When you open the console as explained above, it will view the installation.
Use the key combination ALT + → to exit the installation view and change to the console view. If the view does not change, finish one or two installation steps and try again.
To activate the console, press ENTER.
ALT + ← will take you back to the installation view.
Execute the following commands in the console:
-
Server with IPv4 and / or IPv6
$ ip address $ ip route add 172.31.1.1 dev ens3 $ ip route add default via 172.31.1.1172.31.1.1is a private IP address that you can copy directly with the rest.The first command will print all network interfaces.
The second command specifies that the entire traffic is to be directed via the172.31.1.1gateway with the interfaceens3.
The third command defines172.31.1.1as the default gateway. This means, this gateway will automatically be used, unless stated otherwise.Your server now has a default gateway with the IP address
172.31.1.1.
With ip route show you can check if the changes were saved successfully.
Afterwards, use the key combination ALT + ← to go back to the installation view.
After the installation
To connect to the server after the installation, you can use a normal CLI again, instead of the console on Hetzner Console.
After the installation, you could theoretically use the commands that were also shown for "during the installation". However, the changes would only be saved temporarily, and you would lose them with the next restart.
To change the default permanently after the installation, you will have to edit the network configuration.
Ubuntu/Debian
Ubuntu 20.04 and newer
Ubuntu 20.04 (and newer) uses netplan, which is different to the older configurations of Ubuntu.
Open the .yml file in the /etc/netplan/ folder:
nano /etc/netplan/50-cloud-init.yamlEdit the file:
- Replace
eth0withens3
 network:
   version: 2
   renderer: networkd
   ethernets:
     ens3:
       addresses:
         - <IPv6 address>::1/64
       dhcp4: true
       routes:
       - to: default
         via: fe80::1
Once you are done, you can use CTRL + X to exit the file, Y to save the file and ENTER to confirm.
Debian 10 or newer
Open the configuration file in the /etc/network folder:
nano /etc/network/interfacesEdit the file:
- Replace
eth0withens3
auto ens3
iface ens3 inet dhcp
iface ens3 inet6 static
    address {{ IPv6 address of the server }}
    netmask 64
    gateway fe80::1
Once you are done, you can use CTRL + X to exit the file, Y to save the file and ENTER to confirm.