Note for current Outlook versions
We do not recommend using current versions of Outlook with our ActiveSync server! There are some issue with the synchronization. For Outlook classic we recommend using IMAP/SMTP to synchronize mails. For calendars and contacts we recommend using the plugin CalDAV Synchronizer.
Note for Outlook 2019:
Since Outlook version 2019, there have often been an error during the automated setup of our ActiveSync accounts. The error is "Something went wrong", without any additional error description, and the setup process stops. If this happens to you, you can try to set up the account manually. (See the description below.) For the manual setup to work, you need to have already set up an account, so that you are able to start Outlook in the normal manner (without a setup assistant).
To do the manual setup follow these steps.
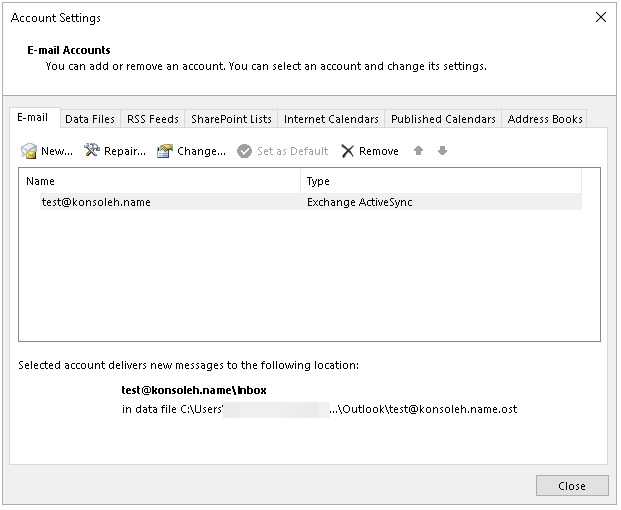
In Outlook 2019, select "File" > "Account settings" > "Manage profile". This will open an older dialog about managing your account. Click on "Email accounts" to open the normal dialog for "Account settings". You can do the manual setup by going to "New..." > "Manual configuration or other server types" > "Exchange Active Sync". Select the settings you would like; they are similar to the settings for Outlook 2013. (See below.)
Note for Outlook for Mac
Outlook for Mac does not support Exchange ActiveSync (EAS). It only supports the standard Exchange protocol. Therefore it is currently not possible to sync Outlook for Mac using ActiveSync.
We recommend using IMAP and SMTP for Outlook for Mac. Please keep in mind that it is not possible to sync calendar events and contacts via IMAP and SMTP.
If you would like to sync calendar events and contacts to your Mac, we would instead recommend using Apples apps like the Calendar app via CalDAV and CardDAV or use another client, e.g. Mozilla Thunderbird.
Settings for Outlook 2013
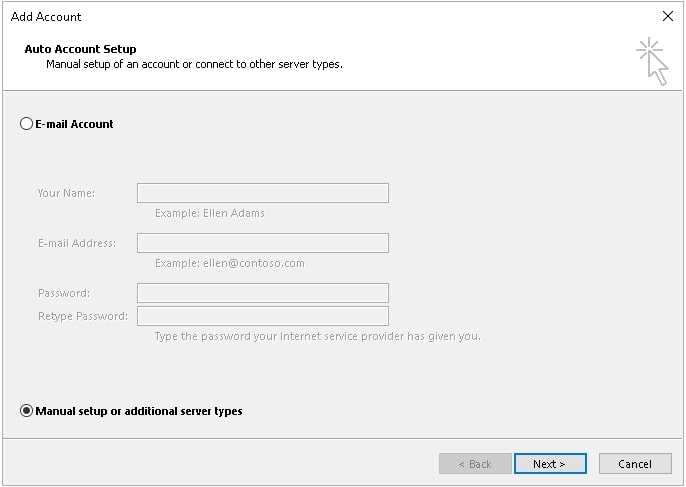
Since Version 2013, MS Outlook has made it possible to set up mailboxes as ActiveSync accounts. However, you will need to manually configure the account for this to work. In the default dialogue for setting up new email accounts, please choose "Manual setup or additional server types" under "Advanced Options".
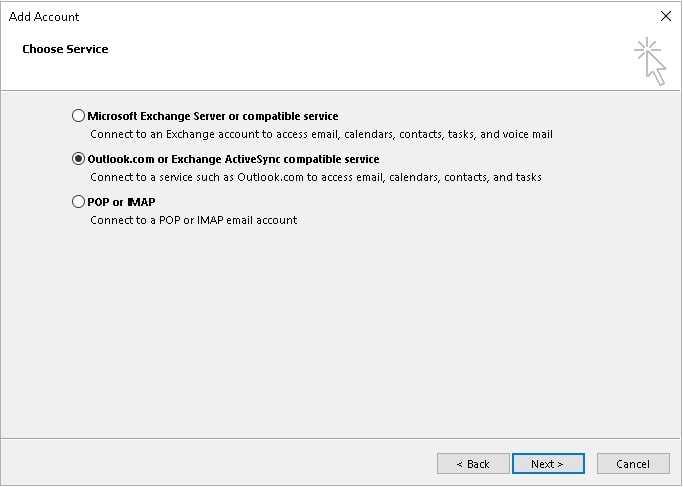
In the next step, when you choose the type of service to use, please choose "Outlook.com or Exchange ActiveSync compatible service".
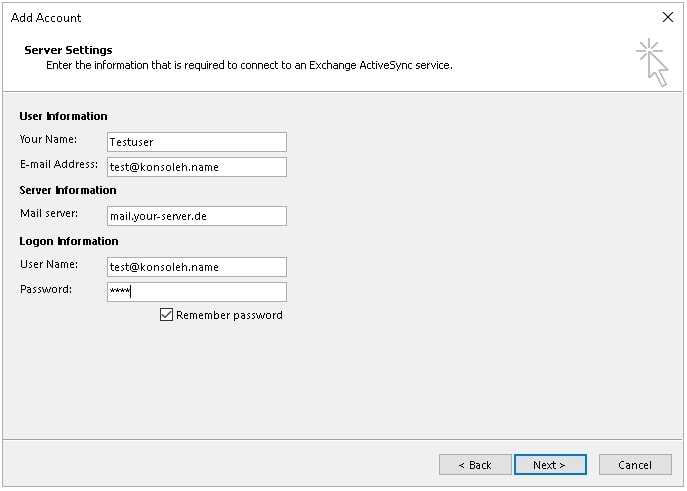
In the next step, please enter your connection and login credentials. To do this, set up a display name for the mailbox and enter your email address. When you enter the server information, please use webmail.your-server.de (without https:// etc.). For the login information, enter your login data for your chosen mailbox.
Outlook will now test the server settings. If you have entered everything correctly, the following prompt should appear. Should the test fail, please check the data you entered in your server settings, like your mail address and password.
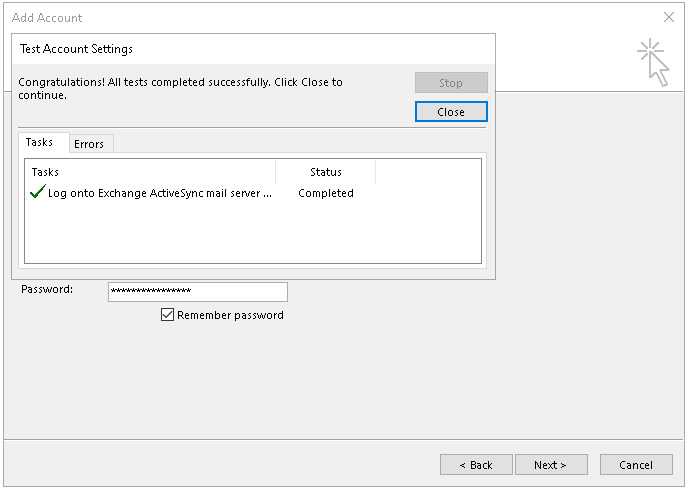
After the setup is complete, confirm by clicking on "Finish". You should now be able to find your Exchange ActiveSync account in the "Account Settings" tab.
