Overview
This tutorial explains how to install the free e-commerce management system Magento2. Magento provides online merchants with a flexible shopping cart system, as well as control over the look, content and functionality of their online store. It offers users powerful marketing, search engine optimization, and catalog-management tools.
Important note: This tutorial is designed for an installation on a Managed Server.
Since Elasticsearch is required as the search engine in order to be able to install and use Magento, the full functionality is not available for [web hosting] (https://www.hetzner.com/webhosting) products.
This is a 3rd party application. We do not provide Magento2 technical support, and we cannot guarantee that it will work properly. For Magento2 support, please see https://developer.adobe.com/commerce/docs/
Prerequisites
Required before installation:
- Composer
- Process release for Java.
- SSH connection to your managed server
Example terminology
- Username:
magenh - Database name:
magento2 - Database user:
magentuser - Hostname / database host:
<dediXXX.your-server.de> - Domain:
<example.com> - Subdomain:
<magento.example.com>
Install OpenSearch
You should request the process release "java" in advance via a support request.
You need to first install, configure and start OpenSearch before installing Magento.
Step 1 - Download
-
Download OpenSearch
cd ~ curl -o opensearch.tar.gz https://artifacts.opensearch.org/releases/bundle/opensearch/2.12.0/opensearch-2.12.0-linux-x64.tar.gz -
Extract the downloaded files
mkdir opensearch
tar xzf opensearch.tar.gz -C opensearch --strip-components 1
Step 2 - Configuration
Add the following lines to the end of the configuration under ~/opensearch/config/opensearch.yml:
network.host: 127.0.0.1
plugins.security.disabled: true
discovery.type: 'single-node'
Step 3 - Start OpenSearch
-
Start OpenSearch with the following command
nohup ~/opensearch/bin/opensearch & -
Use the following command to check whether OpenSearch is running correctly
curl http://localhost:9200/The command should display the following output:
{
"name" : "dediXXX.your-server.de",
"cluster_name" : "opensearch",
"cluster_uuid" : "fDyOCQuIRSGpWoD7adY0Qw",
"version" : {
   "distribution" : "opensearch",
   "number" : "2.12.0",
   "build_type" : "tar",
   "build_hash" : "2c355ce1a427e4a528778d4054436b5c4b756221",
   "build_date" : "2024-02-20T02:18:49.874618333Z",
   "build_snapshot" : false,
   "lucene_version" : "9.9.2",
   "minimum_wire_compatibility_version" : "7.10.0",
   "minimum_index_compatibility_version" : "7.0.0"
},
"tagline" : "The OpenSearch Project: https://opensearch.org/"
}
Step 4 - Setup a @reboot Cronjob
- To start OpenSearch automatically after a server restart, you need to create the following cronjob
@reboot ~/opensearch/bin/opensearch
Install Magento2
Step 1 - Account and webserver configuration
Create an account and an installation directory, which will also be the document_root of your website.
- Log onto your account and navigate to konsoleH.
- Select an existing account or create a new one.
- Create a new directory in your
public_htmldirectory. Later, you will install Magento in this directory:magenh@dediXXX:~/public_html$ mkdir ./magento - Set the newly created directory as
document_rootof your site ("Services" » "Server Configuration").
Step 1.1 - PHP configuration
Set the PHP version to 8.2 or 8.3 (no warranty) and set the following values ("Services" » "PHP Configuration"):
allow_url_fopen = Onmemory_limit = 512Mupload_max_filesize = 128Mmax_execution_time = 3600
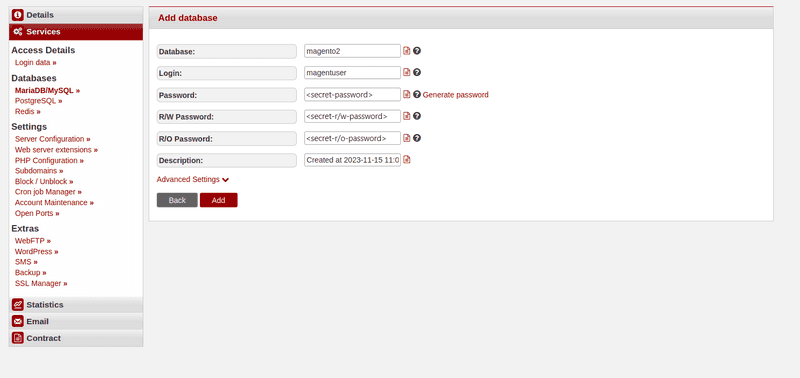
Step 2 - Database setup
Create the database for your Magento2 ecommerce:
- On konsoleH, navigate to "Services" » "Databases" » "MariaDB/MySQL".
- Select "Add" and assign a name to the database and the user.
Step 3 - Download Magento
Now that the prerequisites are installed, you can install Magento:
composer create-project --repository-url=https://repo.magento.com/ magento/project-community-edition <YOUR-INSTALLATION-DIR>Replace
<YOUR-INSTALLATION-DIR>with your magento directory, or just a.if you are executing the command directly within the magento directory.
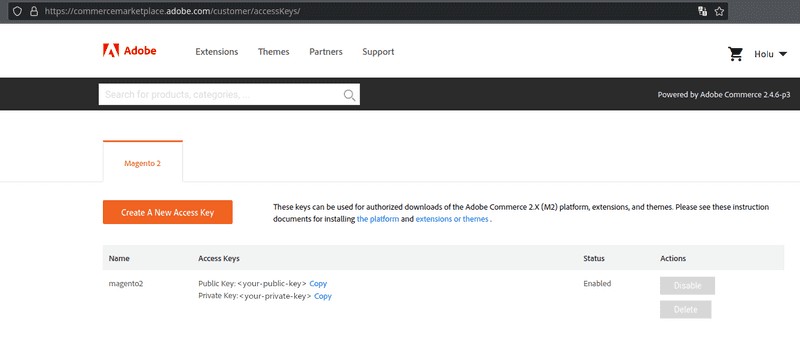
- Log into Adobe Marketplace
- Click on your profile name in the top right and select "My Profile"
- Click on "Access Keys" on the register "Marketplace"
- Select "Create A New Access Key". Give it a name and click "OK"
- Log onto Adobe Marketplace.
- Click on your profile name in the top right and select "My Profile".
- Click on "Access Keys" on the register "Marketplace".
- Select "Create A New Access Key". Give it a name and click "OK".
- In order to authenticate yourself use:
Username = <public_key>andPassword = <private_key>.
Step 4 - Install Magento
Run the following commands in the magento directory.
-
In order to use Magento with MariaDB 10.11, you need to execute the following command in the installation directory
sed -i '/MariaDB-(10./a\\t\t<item name="MariaDB-10.11" xsi:type="string">^10\\.11\\.</item>' app/etc/di.xml -
Run the installation command with customized options
php bin/magento setup:install \
--base-url='http://magento.example.com/' \
--db-host='dedixxx.your-server.de' \
--db-name='magento2' \
--db-user='magentuser' \
--db-password='<secret-password>' \
--admin-firstname='FNAME' \
--admin-lastname='LNAME' \
--admin-email='mail@example.com' \
--admin-user='admin' \
--admin-password='<secure-password>' \
--language=en_US \
--currency=USD \
--timezone=America/Chicago \
--use-rewrites=1 \
--search-engine=opensearch \
--opensearch-host=localhost \
--opensearch-port=9200 \
--opensearch-index-prefix=magento2 \
--opensearch-timeout=15 \
--disable-modules=Magento_TwoFactorAuth,Magento_AdminAdobeImsTwoFactorAuth
Replace the example values with your own data. You should also replace the value of '--admin-password' with a more secure password.
--disable-modules=Magento_TwoFactorAuth,Magento_AdminAdobeImsTwoFactorAuth is used to disable 2FA when logging into the admin panel. You can re-enabled it later.
You can find the configuration of the installation in <installation_dir>/app/etc/env.php:
<?php
return [
    'backend' => [
        'frontName' => 'admin_d43s'
    ],
...
Change the frontName value to any directory on your website where the admin panel is accessible: http://magento.example.com/admin
Further steps
If everything works as expected, you can now get started with Magento! Check if your website is available:
- Frontend:
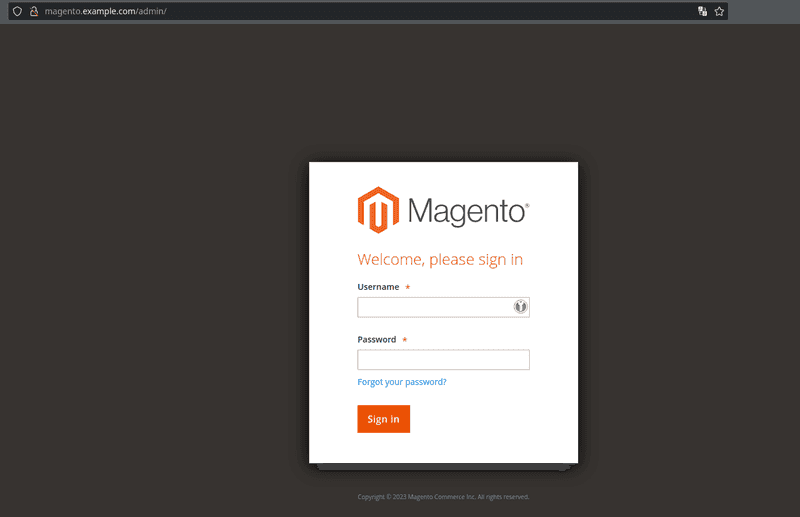
http://magento.example.com/ - Backend:
http://magento.example.com/adminUsername: admin
Password:<secure-password>
This is how the admin page should look:
If you see a system message like "invalid indexers":
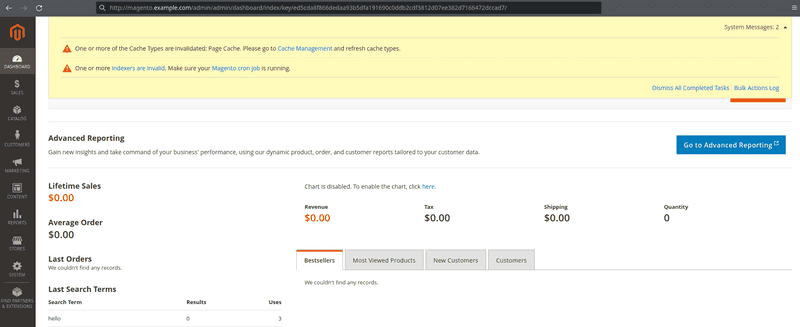
Execute this command:
php bin/magento indexer:reindex
Successfully installing Magento for your e-commerce venture can pave the way for a robust online store.
Remember to keep your installation maintained and up-to-date in order to prevent security gaps.