This tutorial explains how to install the open-source content management system (CMS) Joomla. You can use Joomla to create your own website.
This is a 3rd party application. We do not provide Joomla technical support, and we cannot guarantee that it will work properly. For Joomla support, please see https://www.joomla.org/
Example terminology
- Username:
joomlagg - Hostname:
<wwwXXX> - Domain:
<example.com> - Subdomain:
<joomla.example.com>
Install Joomla
Step 1 - Download Joomla
There are two ways to download Joomla. Choose one of those two options:
-
Option 1 - Via an SSH connection
For this option, you need Web Hosting Level 9 or higher.-
Download the ZIP file
After you establish an SSH connection to your server, you can download the ZIP file directly into thepublic_htmldirectory.joomlagg@<wwwXXX>:~/public_html$ wget https://downloads.joomla.org/de/cms/joomla4/4-3-4/Joomla_4-3-4-Stable-Full_Package.zip -
Unzip the ZIP file
Once theJoomla_<version>-Full_Package.zipfile is downloaded, you can unzip it.joomlagg@<wwwXXX>:~/public_html$ unzip Joomla_4-3-4-Stable-Full_Package.zipYou should now see all Joomla files in the
public_htmldirectory.
-
-
Option 2 - Via an FTP connection
-
Download the ZIP file on your local device
Go to https://downloads.joomla.org/latest and pick one of the packages. Next to the package, click onDownload now. -
Unzip the ZIP file
- On your local device, open the "Downloads" directory. There, you should see the Joomla ZIP file.
- Right-click on the Joomla file.
- In the menu that opens, select "Extract Here" (Linux) or "Extract All..." (Windows).
-
Upload the unzipped files via FTP
You now need to copy the files on the server via FTP. Select all the files within theJoomla_4-3-4-Stable-Full_Packagedirectory on your local device and copy them to thepublic_htmldirectory on the server.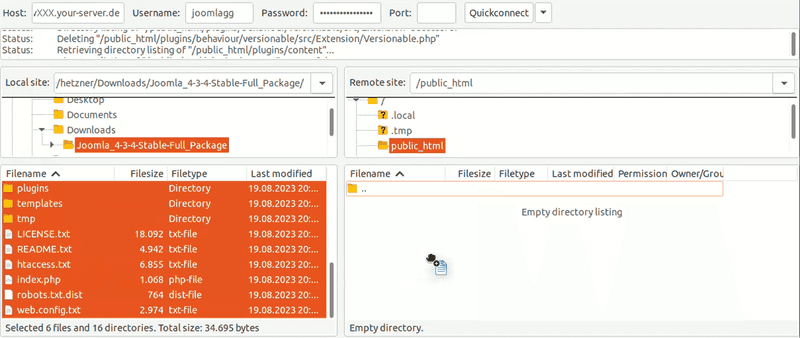
-
Step 2 - Install Joomla
Enter your domain name in a web browser (e.g. joomla.example.com). You should now be on the Joomla installation page.
-
Set up installation language
- Select a language.
- Choose a name for your website.
Once you are done, click on
Setup Login Data.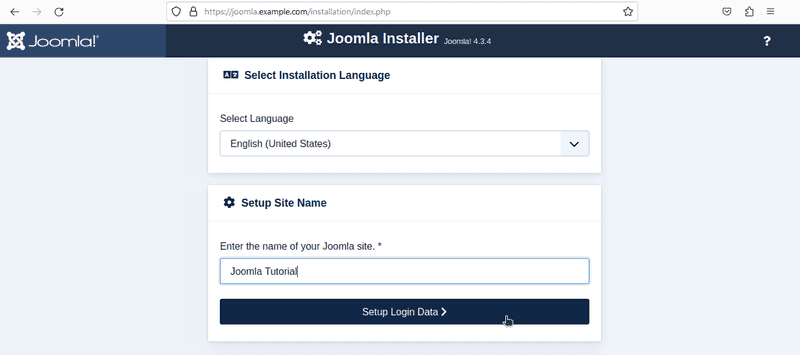
-
Set up Joomla account
You can now create a "Super User". Super users have administrative priviliges.Once you are done, click on
Setup Database Connection.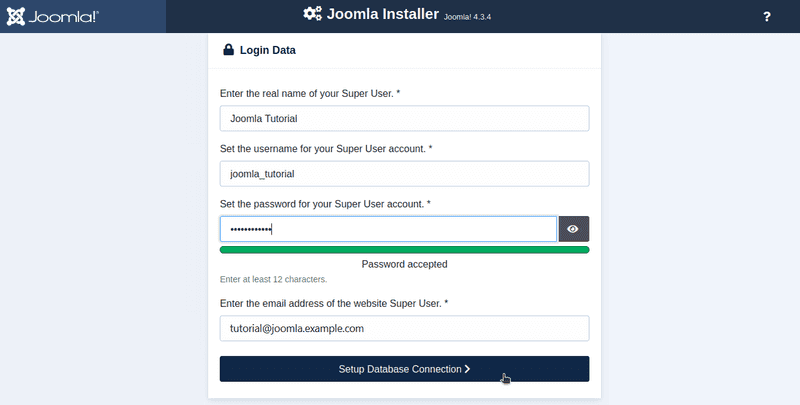
-
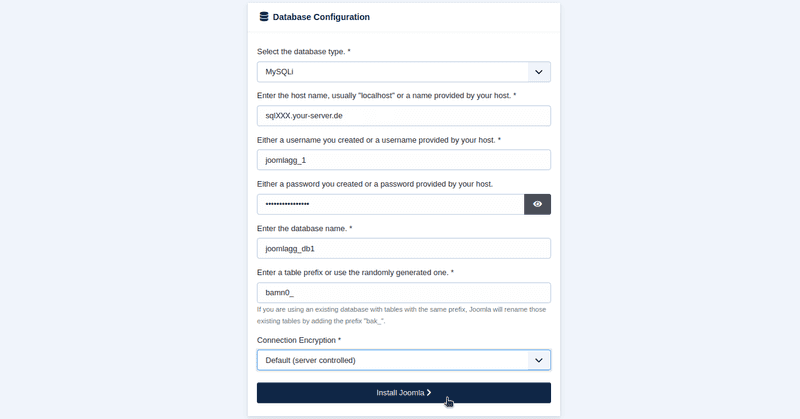
Connect Joomla with the database
-
Confirm your access rights
Next, you need to prove that you "own" the website. To do this, you need to delete a file with a random name from theinstallationdirectory of the Joomla site. It should give you the exact name of the file in a warning at the top (<random-string>.txt).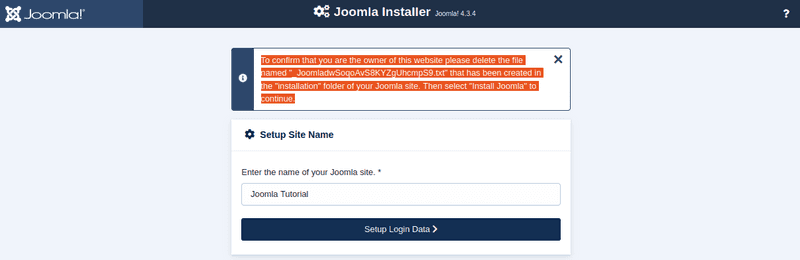
You can pick one of those two options to delete the file:
- Option 1 - Via an SSH connection
joomlagg@<wwwXXX>:~/public_html$ cd installation/ joomlagg@<wwwXXX>:~/public_html/installation$ rm <file-name>.txt - Option 2 - Via an FTP connection
Within theinstallationdirectory, right-click on the file you need to delete (<random-string>.txt). In the menu that opens, select "Delete". When it asks you for confirmation, select "Yes".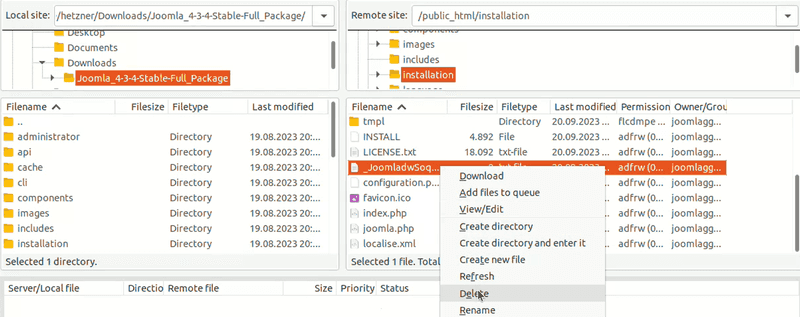
- Option 1 - Via an SSH connection
Step 3 - Complete the installation
After the <random-string>.txt file is deleted, you can complete the installation. For this, click on "Install Joomla". When it is done, it should say something like this:
Congratulations! Your Joomla site is ready.
Further steps
If everything works as expected, you can now create your own website! You can set up your website at https://joomla.example.com/administrator, and you can access your website at https://joomla.example.com.