Step-by-step guide to SSL encryption
People use SSL certificates to transmit confidential data, such as passwords and credit card information, via an encrypted connection (https://). To set up SSL encryption for your account, you will first need a valid SSL certificate. These are usually issued by certification authorities such as DigiCert/Thawte or Let's Encrypt.
We at Hetzner Online, in cooperation with our partners for security solutions, offer both SSL certificates that are free and others that cost a fee. You can then use these SSL certificates on your web hosting accounts and managed servers, and you can create any number of SSL certificates to use for your sub-domains. You can use the administration interface konsoleH to then manage your SSL accounts and certificates.
To find the SSL Manager on konsoleH, log into your administration interface konsoleH using your customer number and password. Then select the domain ( not the hosting) on which you want to set up encryption. Then, a new menu will open with options on the left. Click on "Services", then you should be able to select the SSL Manager and see an overview of your current (sub-)domains and any SSL certificates you already have.
Now follow the steps below depending on what you want to do.
- Do you not already have an SSL certificate? Then please follow the instructions starting with Step 1: Apply for a new SSL certificate.
- Do you already have a valid SSL certificate? Then skip step 1 below, and start with Step 2: Install an SSL account.
Step 1: Apply for a new SSL certificate
You can order business certificates with the "New certificate button" under the "SSL certificates" menu tab. Simply follow the step-by-step instructions that you will then see. Complete the certificate application and then skip down to Step 2 below.
You can apply for free SSL certificates by going directly to the overview for your SSL Account.
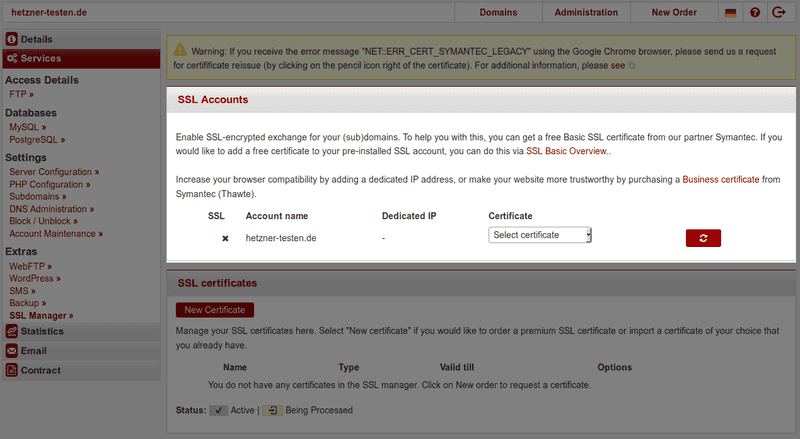
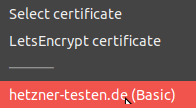
Open the "Install certificate" menu to the right of the account for which you want to activate encryption. You can now choose between different providers who offer free certificates.
Note: If you have already been issued a certificate for your domain, one or more options may not be available to you.
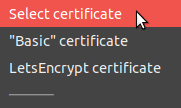
Basic certificates: Our partner DigiCert issues these certificates, which usually are valid for one year. ⚠️ Please note that we are changing the validity periods of the certificates. For more information on the current validity periods, please visit the details page.
Let's Encrypt certificates: The non-profit Internet Security Research Group (which includes Mozilla, Google, and Cisco) issues these certificates. These certificates are valid for only 3 months.
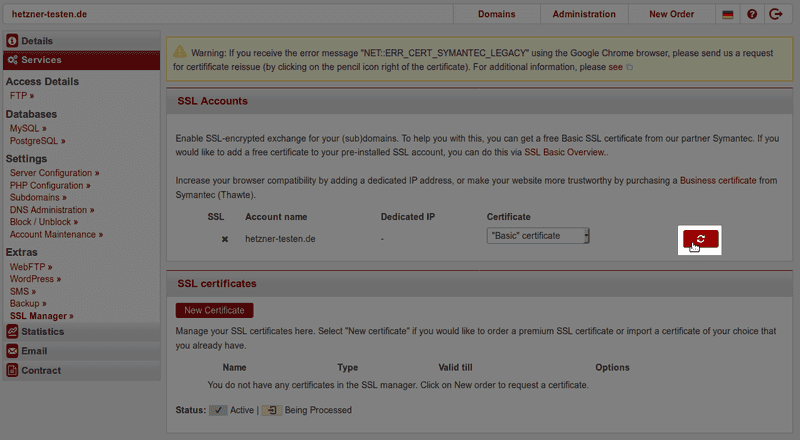
When you choose a certificate, you may see a message that will appear above. Please make sure to read this message if you see one, since it will be about your account.
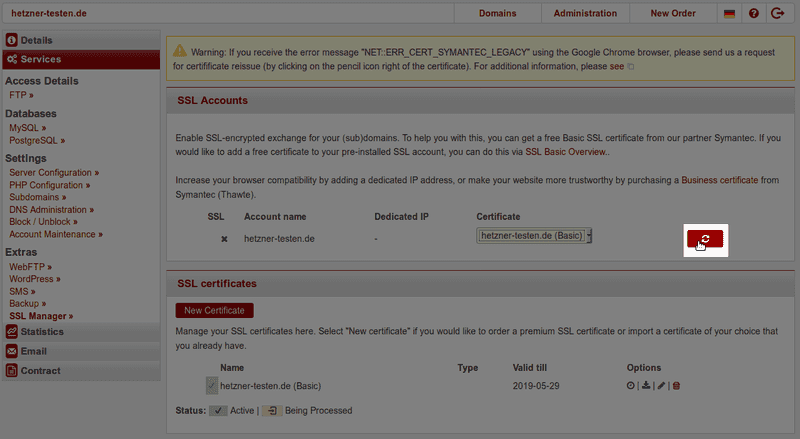
Once you have decided which certificate you want, click on the red refresh icon (two rotating arrows) on the right-hand side.
Below, we first describe the application process for the SSL certificate. This process can take several minutes since it is necessary to first authenticate your domain before the certificate is issued. You will be able to see when the certificate is complete and has been issued to you. There are a few different ways to authenticate your domain:
a) File-based method: With this method, we can authenticate the certificate and issue it directly via our own servers. We store a file with a specific content on our servers, and the certification authority checks this file. This method means that we can issue the certificate directly and install the SSL account for you ourselves.
b) DNS-based method: Using this method, we can authenticate the certificate using our DNS servers. With this method, we store a DNS entry in the zone file of your domain (similar to the file-based method). However, it may take several hours for the entry to become available. So neither we nor the certification authority can verify it directly. We cannot immediately install the SSL account either. Usually, we install the SSL account as soon as the certificate authority has issued the certificate. If the SSL account is not installed automatically, please follow the instructions in Step 2.
c) Manual method: Some domains require manual authentication for certification. The method will be a manual version of either file-based or DNS-based authentication. You will receive an authentication token, which you can use to complete the certificate application.
You will receive this token directly as a response to your SSL order. However, if you no longer see this, you can find the token another way. Go to the SSL Manager menu. You will see your domain and certificates for them. If you need to do a manual authentication, you will see "Authentication" in red on the right hand side under "Option". Click on "Authentication" in red. Then a new menu will pop up. This is the token. You can choose whether to do file-based or DNS-based authentication, but you must complete one method for the certificate to be authenticated and for it to become valid:
-
For file-based authentication: Look at the token. Towards the top, you will see a URL and a short text after "Content." Create a simple text file. Copy paste the information after "Content" into the text file. Make sure there are no extra spaces or characters. Save the file under the URL name shown in the token. Again, be careful to copy and paste the exact URL. At the end, you can check that everything is correct if you enter the URL into your browser and you see the correct content from the token.
-
For DNS-based authentication: Look at the token. Look about half-way down. There you will see the DNS entry you need to make. Copy and paste the displayed DNS record and save it on the name server that is responsible for your domain. Please make sure the DNS record matches what is displayed exactly. (Make sure to include any periods and apostrophes.) Also, check the type of record is correct (TXT). Warning: If you don't use a konsoleH name server, then entering the TXT records under "DNS management" on konsoleH will not work. Your certificate will not be authenticated.
Note: If you wait more than 24 hours after setting up the authentication tokens and the authentication is not done yet, please check our SSL certificate details page to see common problems that are associated with authentication.
Your SSL account cannot be installed until your SSL certificate is authenticated. Usually, the SSL account is installed very quickly after the certificate is issued. If this does not happen, please follow the instructions in Step 2.
You can monitor the status of your SSL certificate application by looking at the SSL Manager under the "SSL certificates" menu tab.
Step 2: Install an SSL account
Follow these steps to install an SSL account.
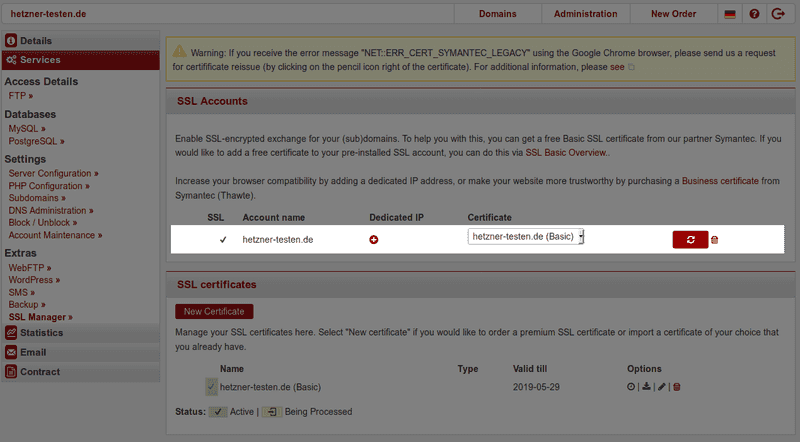
If the SSL account could not be installed automatically during the ordering process, please install it manually after the certification process is finished. Open the SSL Manager on konsoleH. If the SSL certificate is ready for installation, it will be under "SSL certificates" and will be marked with a green bar. (See screenshot.)
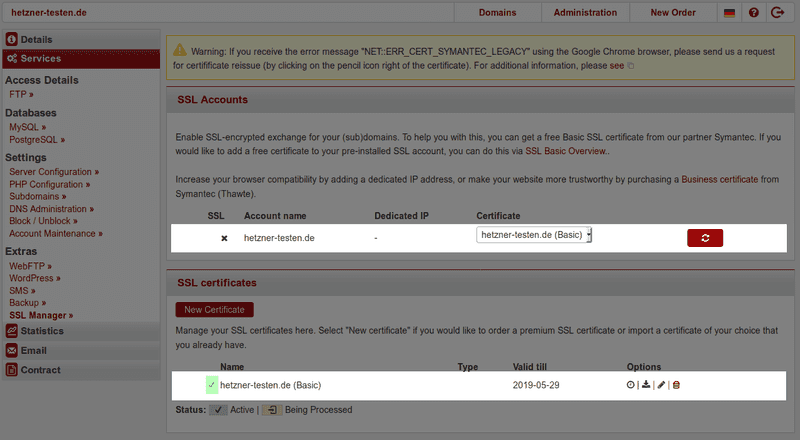
Under "SSL accounts" and "certificate", you should now be able to select the issued certificate for your account.
If the certificate is not finished yet, or if it is still in the renewal process, you may not be able to select it yet.
After selecting the correct SSL certificate, you can then install the SSL account by clicking on the "refresh" icon (two rotating arrows) on the right-hand side.
After your SSL account is successfully installed, you will be able to see a green check mark next to it.

SSL encryption for your account is now active. Important note: To create a secure connection to your domain, you must use https:// to call up the domain. You can read about how to force your visitors to use an https:// connection by going to the SSL-Accounts section.