This article describes how to switch a iDRAC system from a DHCP-based network configuration to a static IPv4 configuration.
Presumptions for this example
This article will use the following example information for the setup:
| Variable | Value |
|---|---|
| IPv4 iDRAC address | 192.0.2.11 |
| IPv4 Gateway | 192.0.2.1 |
In order for you to follow along you will need your specific information on hand.
It can be found in the Hetzner Robot:
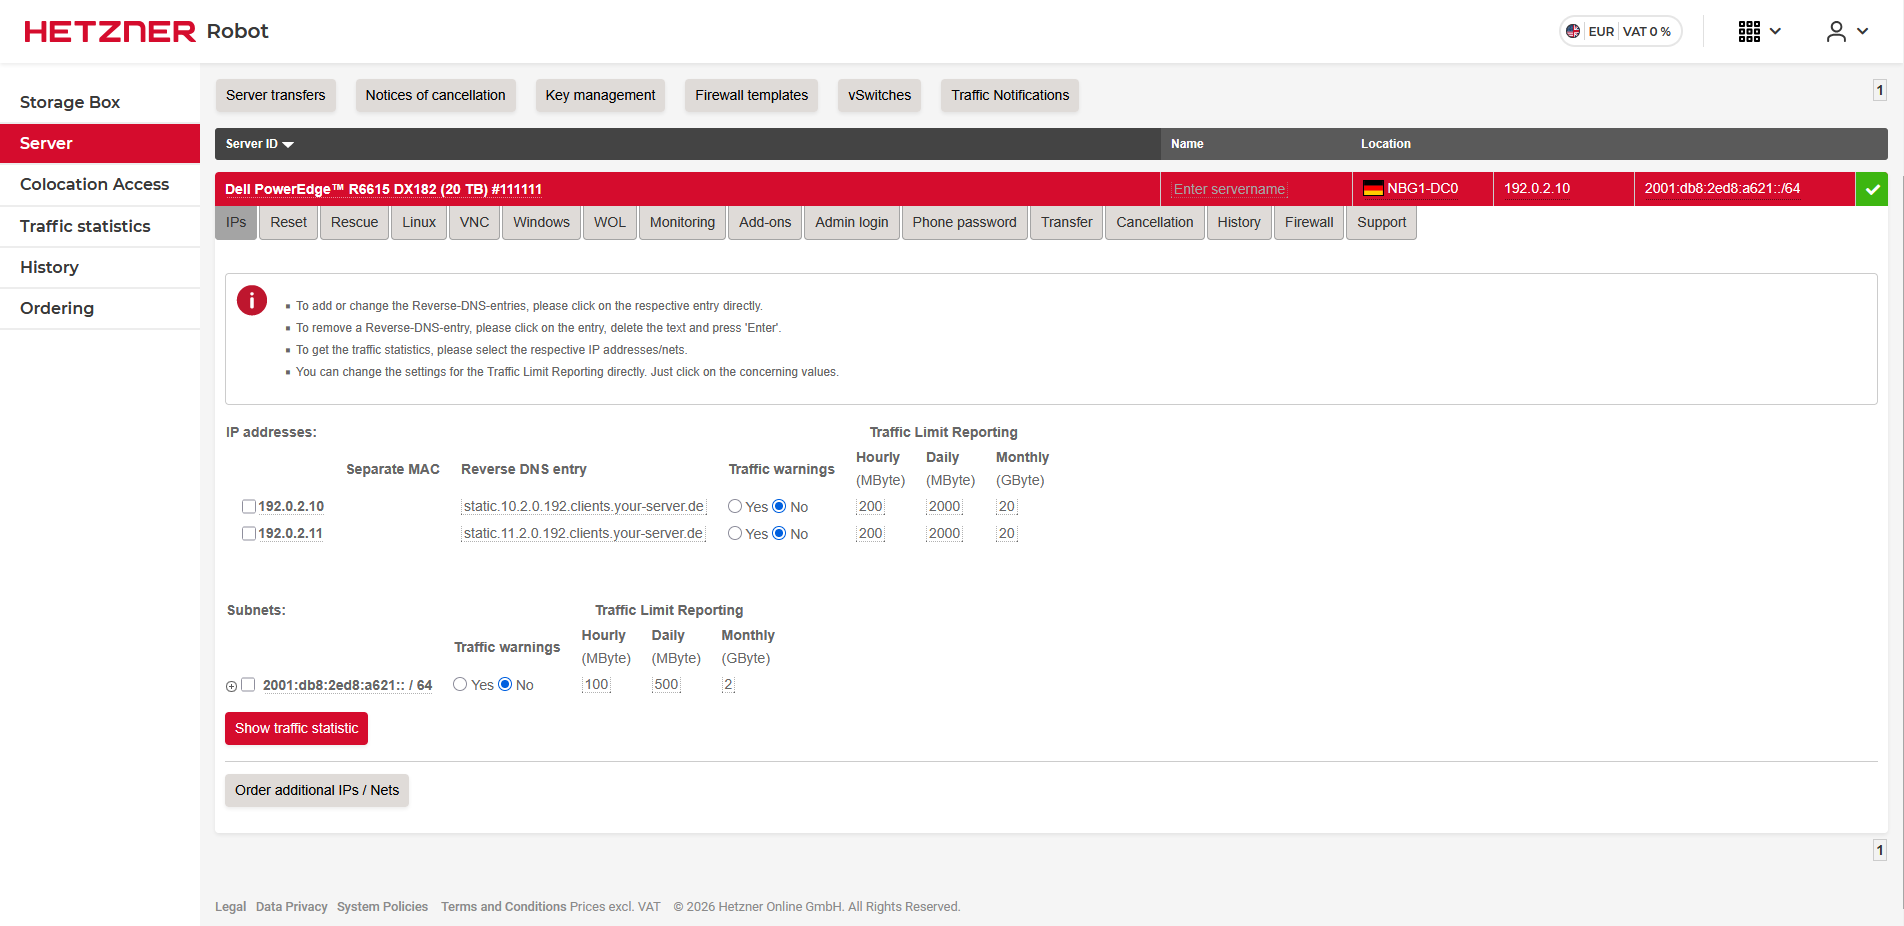 (The gateway for your IP can be found by hovering over it.)
Other (real world) information for this example would be the following:
| Variable | Value1 | Value2 |
|---|---|---|
| IPv4 DNS Servers | 185.12.64.1 | 185.12.64.2 |
Switching to Static IP
There are two ways to go about this.
- Using the ipmitool cli utility
- Using the web interface
The ways will also differ between the iDRAC revisions.
iDRAC 9 (Gen14,15,16)
ipmitool
You can either install the ipmitool cli utility on your host OS or boot the server into the Hetzner Rescue System. For instructions on how to use the Hetzner Rescue System, please consult this Article.
Once you have ipmitool available, you will need the following commands, to get a static configuration working on your iDRAC:
root@rescue ~ # ipmitool lan set 1 ipsrc static

root@rescue ~ # ipmitool lan set 1 ipaddr 192.0.2.11
        Setting LAN IP Address to 192.0.2.11

root@rescue ~ # ipmitool lan set 1 netmask 255.255.255.255
        Setting LAN Subnet Mask to 255.255.255.255

root@rescue ~ # ipmitool lan set 1 defgw ipaddr 192.0.2.1
        Setting LAN Default Gateway IP to 192.0.2.1

root@rescue ~ # ipmitool mc reset cold
For instructions on how the DNS Server can be configured, follow the corresponding instructions in the Web-Interface section.
Web interface
Here you can find the IP config under:
- iDRAC Settings
- Connectivity
- Network
- IPv4 Settings
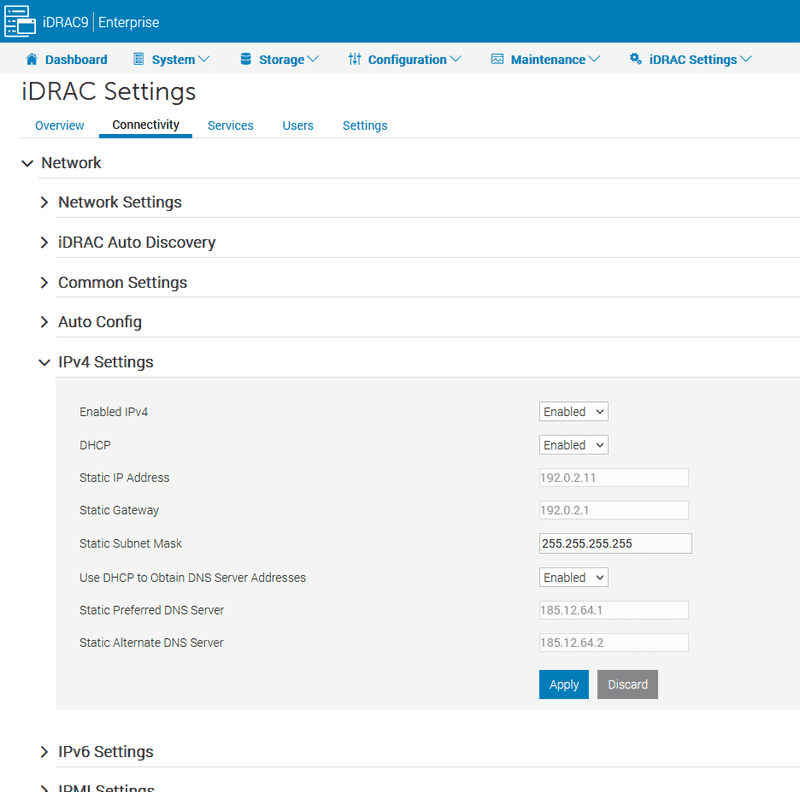
Here we will need to set the DHCP option to Disabled and fill the form with the information we gathered previously.
So it should look something like this:
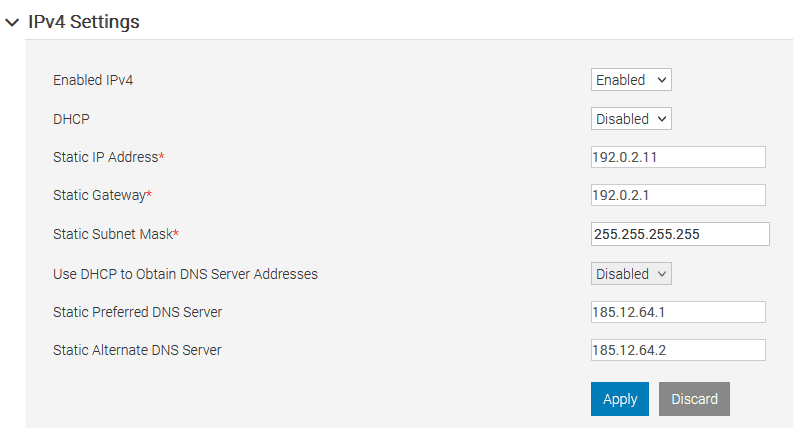
Please make sure that the DNS entries are also set to the correct values. By pressing apply the settings will be saved but not applied imidiately.
For this we will need to reboot the iDRAC of your server. The button for this can be found here:
- Dashboard
- More Actions
- Reboot iDRAC
On older revisions of the iDRAC 9 it may be in a different spot:
- Maintenance
- Diagnostics
- Reboot iDRAC
iDRAC 8 (Gen12,13)
Since the iDRAC 8 does not support point-to-point connections we can not simply set a subnet mask of 255.255.255.255. Therefore we will need to find out what the correct subnet mask for our subnet is. This can be found by hovering over the corresponding IP in the Hetzner Robot.
In our case the correct subnet mask would be 255.255.255.0.
ipmitool
You can either install the ipmitool cli utility on your host OS or boot the server into the Hetzner Rescue System. For instructions on how to use the Hetzner Rescue System, please consult this Article.
Once you have ipmitool available, you will need the following commands, to get a static configuration working on your iDRAC:
root@rescue ~ # ipmitool lan set 1 ipsrc static

root@rescue ~ # ipmitool lan set 1 ipaddr 192.0.2.11
        Setting LAN IP Address to 192.0.2.11

root@rescue ~ # ipmitool lan set 1 netmask 255.255.255.0
        Setting LAN Subnet Mask to 255.255.255.0

root@rescue ~ # ipmitool lan set 1 defgw ipaddr 192.0.2.1
        Setting LAN Default Gateway IP to 192.0.2.1

root@rescue ~ # ipmitool mc reset cold
For instructions on how the DNS Server can be configured, follow the corresponding instructions in the Web-Interface section.
Web interface
Here you can find the IP config under:
- The
+next to iDRAC Settings (on the left hand side) - Network
- Then scroll down to IPv4 Settings

Here we will have to disable DHCP for both the IP address as well as the DNS servers. Then we will have to enter the information we collected above.
So for our example it should look something like this:
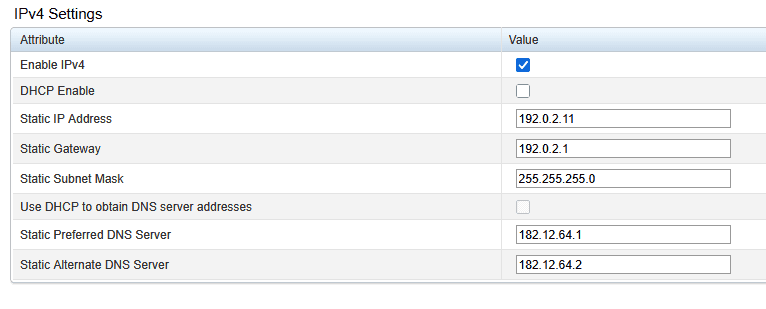 After you have entered all the necessary details, we need to click the apply button all the way at the bottom of the page.