Roles and Features
The required roles and features are:
- DHCP server
- Hyper-V
You can install these on the Server Manager by adding Roles and Features.
During the initial installation of Hyper-V, don't create a virtual switch.
Routing & Network
Hetzner routes the additional subnet onto the main IP of the server and doesn't assign any MAC addresses. Therefore, to be able to use the additional IPs, they must be routed locally on the server.
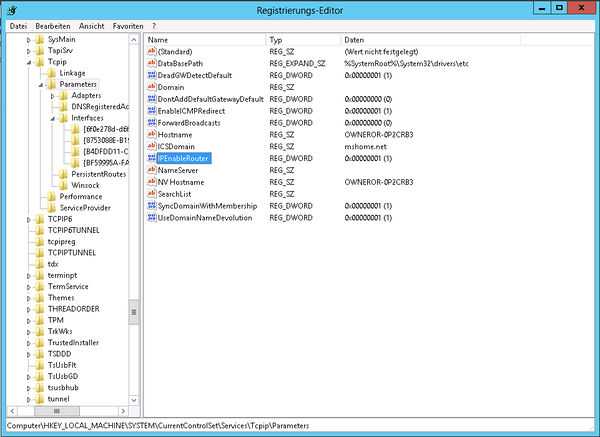
Activating TCP/IP Forwarding
- Run regedit.exe
- Navigate to
HKEY_LOCAL_MACHINE\\System\\CurrentControlSet\\Services\\Tcpip\\Parameters - Change the entry
IPEnableRouterREG_DWORDtype to 1
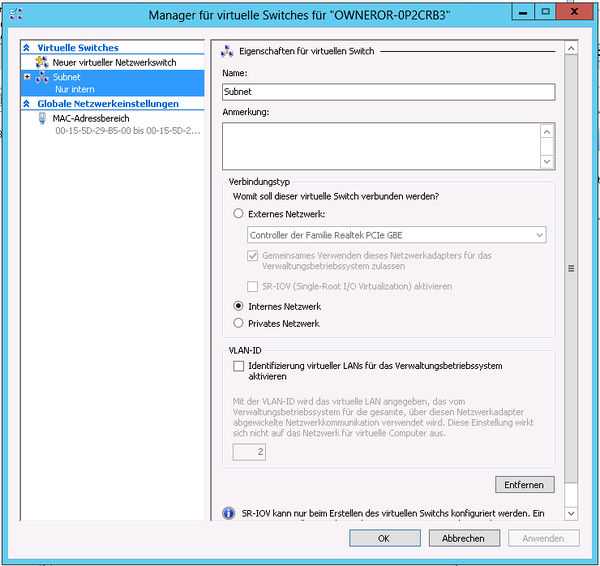
Creating a Virtual Switch
- Open the Hyper-V Manager and create a new internal virtual switch type in the manager for virtual switches.
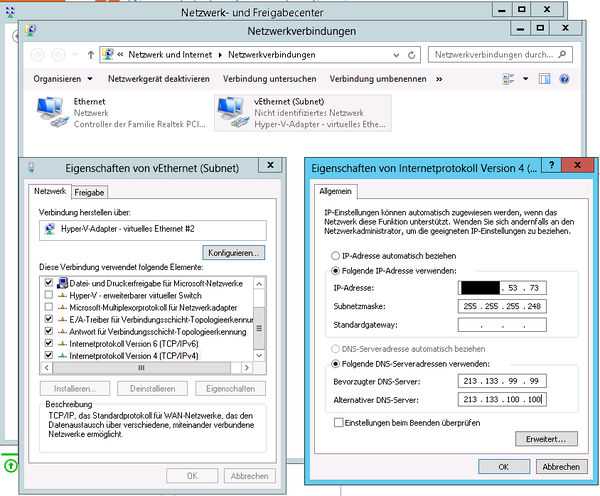
Configure the Interface
- Configure an IP from the subnet in the adapter settings of the newly created virtual switch by selecting the Network and Sharing Center in the Control Panel.
After a reboot, this configured IP should be reachable (ping) if you have correctly enabled forwarding.
DHCP
You need to set up a DHCP server so you can automatically assign IPs from the the subnet to the virtual machines and enable PXE boot.
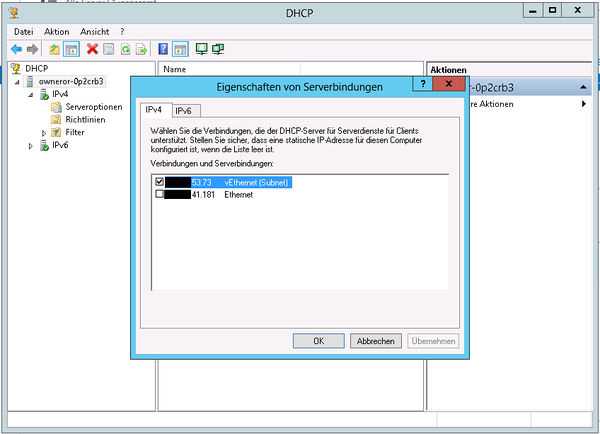
Configuration
In the Server Manager, open the DHCP applet and change the following settings:
- Right-click on the server -> Add/Remove Bindings -> Remove the checkbox for the external interface.
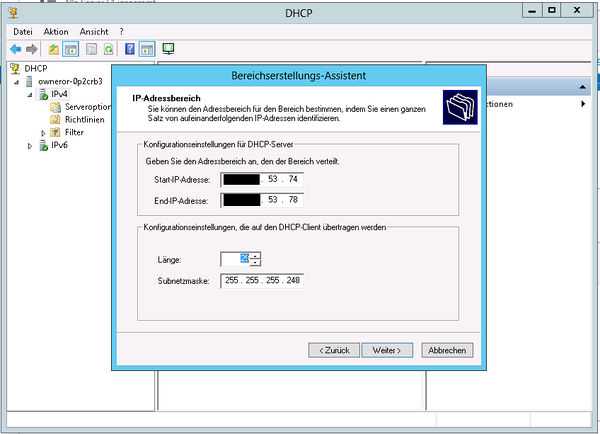
- Right-click on IPv4 -> New Scope -> Configure Subnet IPs.
- Please note that you need to specify the first IP to the final IP, minus the Network IP, the already-configured virtual switch IP and the Broadcast IP.
- Example: the subnet received from Hetzner:
192.168.53.72/29
Network IP: 192.168.53.72
(Proposed) Virtual Switch IP: 192.168.53.73
Broadcast IP: 192.168.53.79
Usable IPs: 192.168.53.74 – 192.168.53.78
- Set the Router IP to the IP configured for the virtual switch.
- Don't change any of the steps not mentioned in this guide.
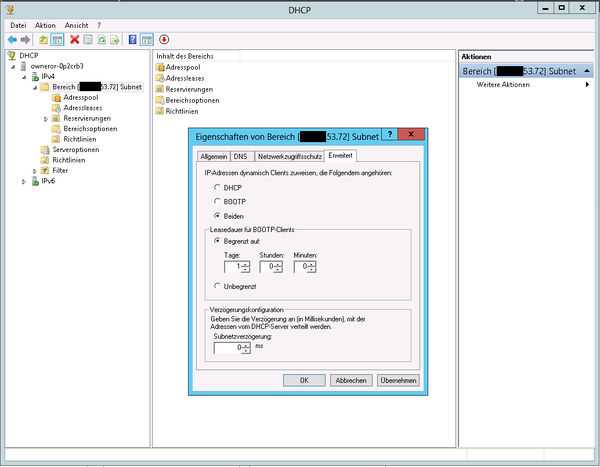
- Right-click on the newly created scope -> select Properties in the Advanced tab, and set and confirm the configuration on both (DHCP & BOOTP).
-
In the newly created scope, select the category scope options -> right-click on options and set two additional checks next to the points 066 and 067.
- 066 Hostname of the Service Point -> string value:
- Falkenstein and Nuremberg:
188.40.24.200/fsn1-dhcp1.hetzner.company - Helsinki:
95.217.255.70/hel1-dhcp1.hetzner.company
- Falkenstein and Nuremberg:
- 066 Hostname of the Service Point -> string value:
-
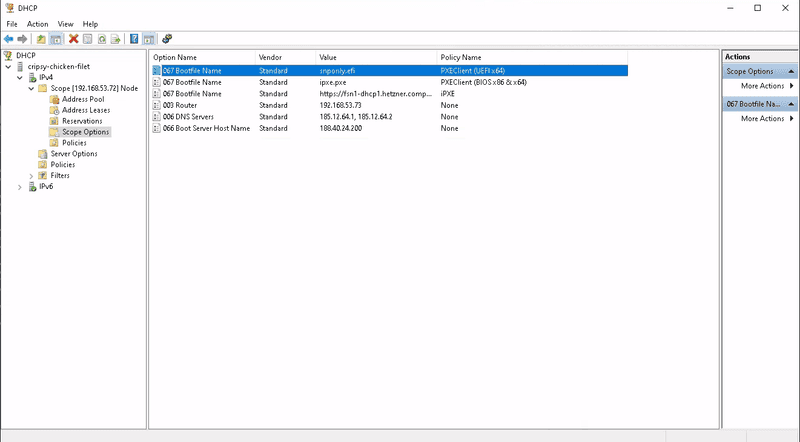
For the file name, a policy has to be created to set different file names based on the boot type (Legacy, UEFI or iPXE). This has to be done via PowerShell (Admin).
# REPLACE 192.168.53.72 WITH YOUR SCOPE ID!!!
Add-DhcpServerv4Class -Name "PXEClient (UEFI x64)" -Type Vendor -Data "PXEClient:Arch:00007"
Add-DhcpServerv4Class -Name "PXEClient (BIOS x86 & x64)" -Type Vendor -Data "PXEClient:Arch:00000"
Add-DhcpServerv4Class -Name "iPXE" -Type User -Data "iPXE"
Add-DhcpServerv4Policy -Name "PXEClient (UEFI x64)" -ScopeId 192.168.53.72 -Condition OR -VendorClass EQ,"PXEClient (UEFI x64)*"
Add-DhcpServerv4Policy -Name "PXEClient (BIOS x86 & x64)" -ScopeId 192.168.53.72 -Condition OR -VendorClass EQ,"PXEClient (BIOS x86 & x64)*"
Add-DhcpServerv4Policy -Name "iPXE" -ScopeId 192.168.53.72 -Condition OR -UserClass EQ,"iPXE"
Set-DhcpServerv4OptionValue -ScopeId 192.168.53.72 -PolicyName "PXEClient (UEFI x64)" -OptionId 067 -Value "snponly-amd64.efi"
Set-DhcpServerv4OptionValue -ScopeId 192.168.53.72 -PolicyName "PXEClient (BIOS x86 & x64)" -OptionId 067 -Value "undionly.kpxe"
# IMPORTANT: REPLACE THE URL WITH THE CORRECT LOCATION DHCP!!!
Set-DhcpServerv4OptionValue -ScopeId 192.168.53.72 -PolicyName "iPXE" -OptionId 067 -Value 'https://<REPLACE_LOCATIONDHCP>.hetzner.company/api/v2/tftp/boot_config?ip=${netX/ip}'
IP - MAC mappings for static VM IPs - Optional (recommended)
First, complete the steps in the section Hyper-V below.
- In the newly created scope, select the category address leases -> richt-click on each listed IP -> select add to reservation.
Each IP is then statically bound to each virtual machine.
Hyper-V
- Create a new virtual machine (Gen2).
- Connect its network adapter to the internal virtual switch.
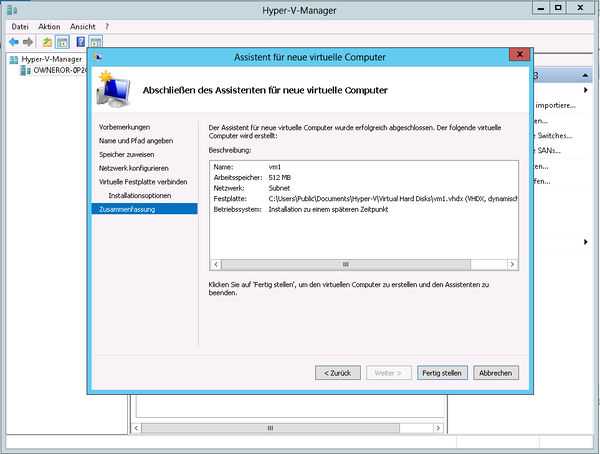
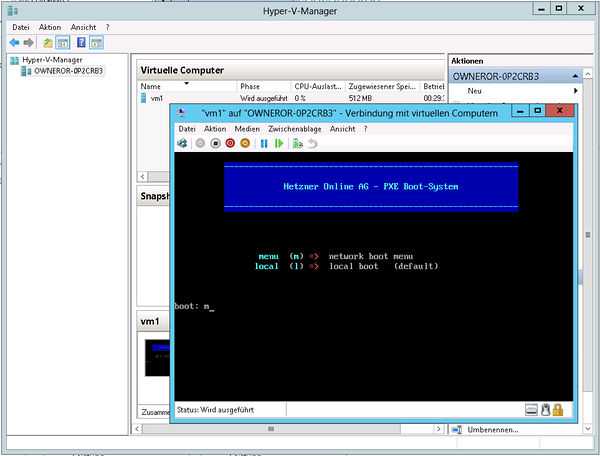
- Start the virtual machine and test PXE Boot.
- With a correct configuration, you should see the Hetzner PXE Boot menu (blue logo).
- Perform the optional step in IP-Mac Mapping above.
- Enable the installation of an OS via Robot for the configured subnet IP. Then restart the virtual machine, letting it boot via PXE. Instead of the Hetzner PXE boot menu, the installation of the OS will automatically start. Once the standard login screen appears, the installation is complete and you can use the virtual machine.
IPv6
Hetzner routes the IPv6 subnet on the respective link local address of the server fe80::/64. Therefore, to be able to use the above mentioned setup for IPv6 for your virtual machines, you will need to make the following configuration changes:
- Give the external interface the first address of the subnet
::1/128, with the gatewayfe80::1. - Give the virtual switch the second address
::2/64, without a gateway. - Give the virtual machines the following consecutive IPs and use the IP of the virtual switch as the gateway
::2.
Using netsh, activate forwarding:
netsh interface ipv6 set interface Extern forwarding=enabled advertise=enabled
netsh interface ipv6 set interface vSwitch forwarding=enabled advertise=enabled advertisedefaultroute=enabled
In order to use static IPv6 Addresses via DHCPv6 use netsh to set the interface:
netsh interface ipv6 set interface vSwitch managedaddress=enabledIf it is not set automatically by Windows, use netsh to set the routes:
netsh interface ipv6 add route prefix=xxxx:xxxx:xxxx:xxxx::/128 interface=Extern publish=yes
netsh interface ipv6 add route prefix=xxxx:xxxx:xxxx:xxxx::/64 interface=vSwitch publish=yes