After your server has been created, you can connect to it via SSH by using a command-line interface (CLI).
-
Enter the following command to connect to your server remotely
Via IPv4 or IPv6:
-
IPv4
$ ssh root@<203.0.113.1>Change
<203.0.113.1>to the actual IPv4 address of your own server. -
IPv6
The cloud servers are always assigned a /64 network for their IPv6. By default, we assign the first address from this network to the server. To connect to your server, do not specify the network/64in the end, but instead use the first address1.$ ssh root@<2001:db8:1234::1>Change
<2001:db8:1234::1>to the actual IPv6 address of your own server.
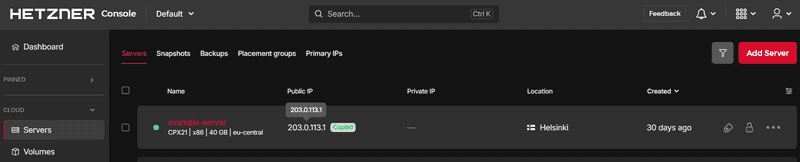
You can copy your IP address from the Hetzner Console by clicking directly on the address.
CLI warning
If there is a warning about host authenticity, you can enter yes.
The authenticity of host '<203.0.113.1> (<203.0.113.1>)' can't be established.
ECDSA key fingerprint is SHA256:Jw/3FIJwpp3FIJw/3FIJw/3FppLVppmjWs.
Are you sure you want to continue connecting (yes/no/[fingerprint])?
The fingerprint shown in the warning will be saved locally and automatically be recognized in the future. You can access this fingerprint in the following file:
~/.ssh/known_hostsIf you delete your server, the fingerprint will no longer be valid.
-
-
The next step will depend on whether you have added an SSH key when you created your server
-
SSH key
If you have not set a password, you will automatically be connected. If you have set a password, please enter it now. -
No SSH key
Your root password will have been mailed to you if you created a server without selecting an SSH key. Please enter it now.
Please note that your password will not be visible in the CLI.
Change your password:
The first time you log into your server via root password you will be asked to change your password.
Please enter your current password and set your new password.
-
-
Edit the
configfile on your local deviceNow that you have seen how to connect to the server, you can optionally go on and add a new entry to the
configfile on your local device. With an entry like this, you will be able to simply usessh <unique-name>instead ofssh <username>@<IP-address>to connect to the server.You can add new entries to the
configfile in the following format:Host <unique-name> HostName <IP-address> User <username> PreferredAuthentications <publickey/password>Use
CTRL+Dto end the connection to your server. You should now be back on your local device.Edit the
configfile on your local device:nano ~/.ssh/configAdd the following text at the end of the file:
Host <unique-name>
        HostName <203.0.113.1>
        User root
        PreferredAuthentications publickey
Change
<unique-name>to any name of your preference,<203.0.113.1>to the actual IP address of your server, androotto your own user name on the server. If you haven't added an SSH key to your server, change your "PreferredAuthentications" from "publickey" to "password".Once you are done, you can use
CTRL+Xto save the file,Yto confirm andENTERto close the file.With the new entry, you can now use
ssh <unique-name>instead ofssh root@<203.0.113.1>to connect to your server. -
Test if the entry is working
Connect to your server:
ssh <unique-name>
You should now be connected to your server. To end the connection, use CTRL+D.
Next: