To create a new record on your Hetzner Console, please open your project and do the following:
-
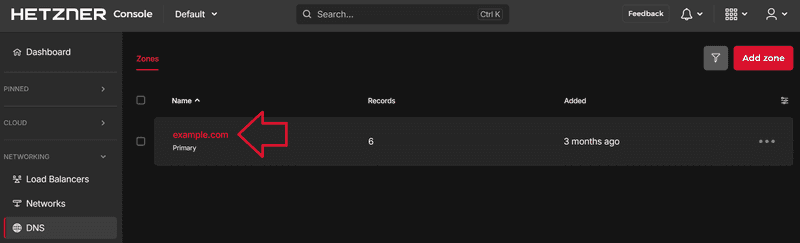
Go to DNS on the left menu bar

-
Select the respective zone
-
Click on the "Type" to expand the list with all available record types
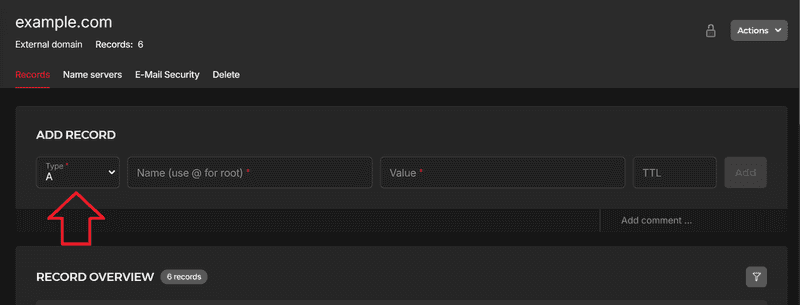
Fill out all required fields.
Under record types, you can find a separate article for each available type. Each article explains which information needs to be provided in the corresponding fields.
After you added every required information, click on Add to create the new record.