General information
With the vSwitch feature, Hetzner Online has created a tool for your dedicated servers that lets you connect them in multiple locations to each other using virtual layer 2 networks. On your account on the Robot administration interface, you can create and configure vSwitches using the "vSwitches" button in the server overview. You can find more details in this article.
Server configuration (Windows)
For the vSwitch, you need to configure an interface with the VLAN ID that you have entered on Robot. You should limit the MTU (Maximum Transmission Unit) of the interface to 1400.
Dedicated Servers
VLAN interface via NIC teaming
To send VLAN traffic via the same interface as the host's main IP address, you need to include the physical adapter in a team. You also need to assign a virtual interface for each VLAN ID to the team and its corresponding team adapter.
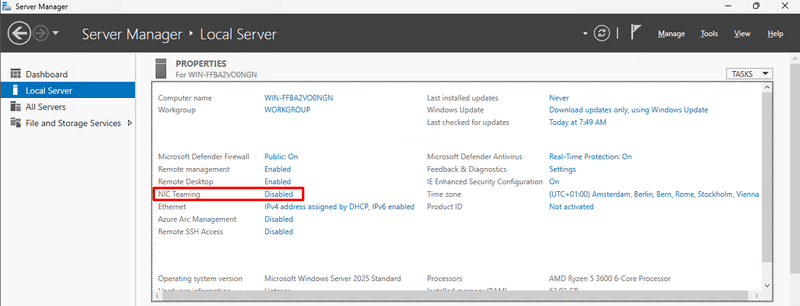
In Windows' Server Manager, go to Local Server and then to NIC teaming.
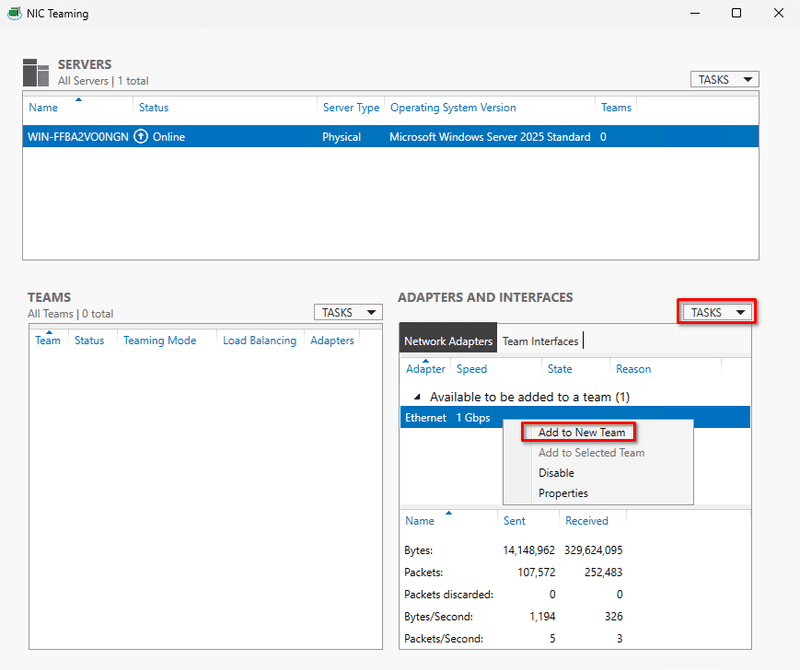
In the newly opened NIC Teaming window, create a new team by selecting any available Network Adapter in the Network Adapters tab in the Adapters and Interfaces section, then either click on Tasks or right-click any available Network Adapter, and then on Add to New team.
Note: If no Network adapter is selected all Tasks menu options will be greyed-out.
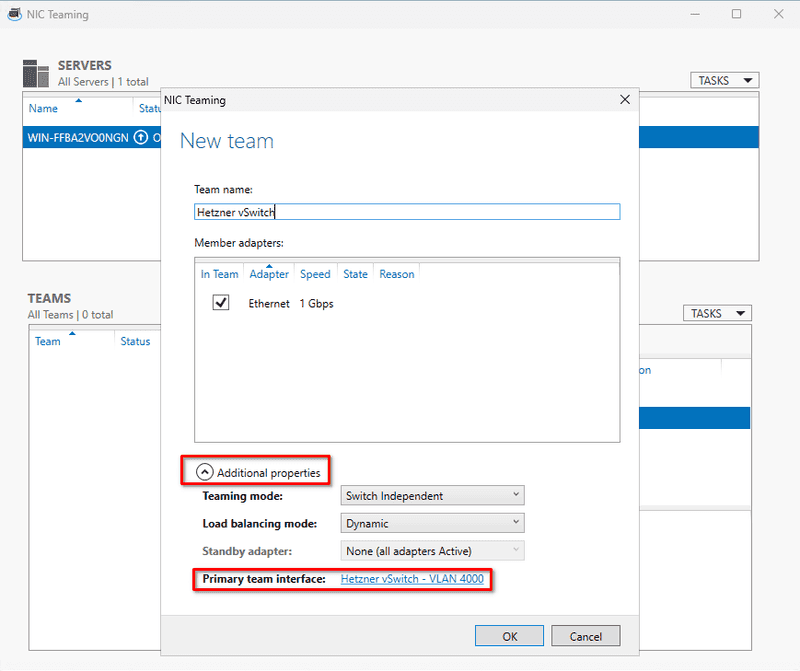
Select all interfaces you want to use with the vSwitch. Then click on Additional Properties, then the NIC Team name next to Primary Team Interface.
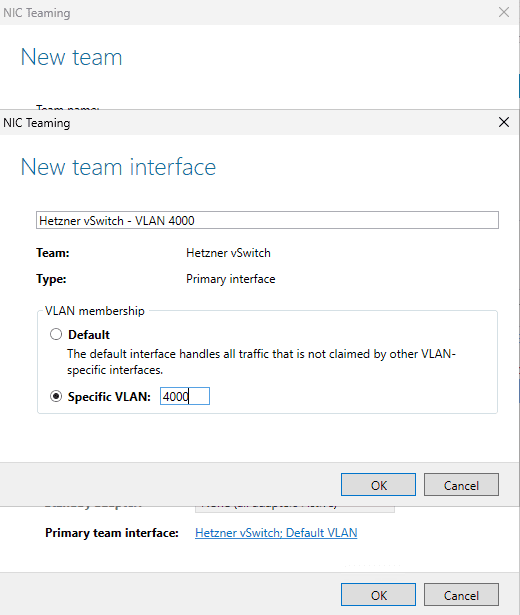
Select Specific VLAN and enter the VLAN ID you chose for your vSwitch on Robot.
Note: RDP sessions may disconnect upon clicking OK when the network configuration is being updated.
Interface configuration
You can now manage the VLAN interface that you created using NIC teaming. Go to the control panel and then to Adapter configuration.
Important note: Windows does not support multiple default gateways. Depending on your individual configuration, you may therefore have to set additional static routes according to your requirements.
Add IP addresses
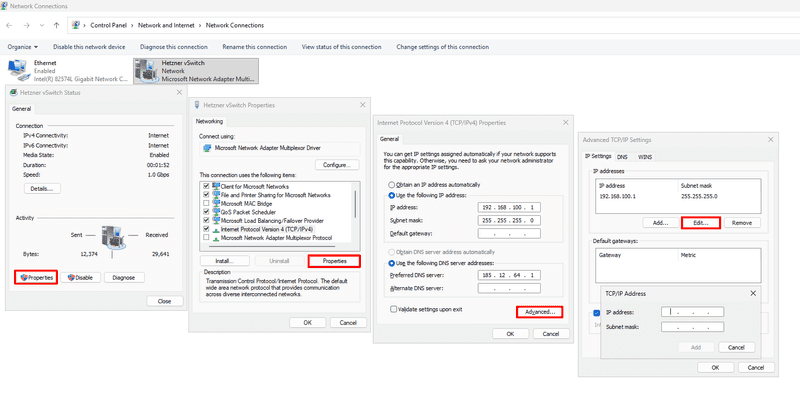
You can configure an IP as usual by going to the Network Adapter properties for the NIC teaming adapter. (ncpa.cpl; Control Panel\Network and Internet\Network Connections)
More than one IP on the interface
Multiple address can be added by going to the TCP/IP dialog and then clicking on the Advanced... button.
MTU
Reduce the MTU to 1400 for VLAN interfaces. You can configure this via command prompt.
Retrieve the interface names and IDs:
\:> netsh interface ip show interface
Set the MTU for the individual VLAN interfaces:
\:> netsh interface ipv4 set subinterface <id> mtu=1400 store=persistent
Do the same for IPv6:
\:> netsh interface ipv6 set subinterface <id> mtu=1400 store=persistent
Hyper-V
It is not necessary to do a configuration with NIC teaming so that you can use VLANs in connections with virtual servers.
All you need to do is configure a VLAN ID for each virtual machine's network adapter by going to Settings.
But you still need to change the MTU for each virtual server.
Connecting Windows to the Cloud-Network
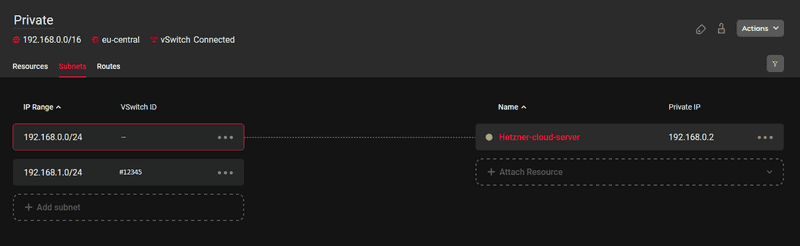
If you have followed the steps above, you should also be able to connect your Windows Server to the Hetzner Cloud Network by simply setting a static route. For the sake of this example, lets assume that you have already setup your cloud network and have added the vSwitch with the following configuration:
- 192.168.0.0/16 - Your cloud network (parent network)
- 192.168.0.0/24 - Cloud server subnet
- 192.168.1.0/24 - vSwitch (#12345)
The configuration should look something like this:
In order for the servers to be able to communicate with each other, you will have to set a static route that forwards the subnet of the parent cloud network via the vSwitch.
You can use the following command in Powershell to set a persistent static route:
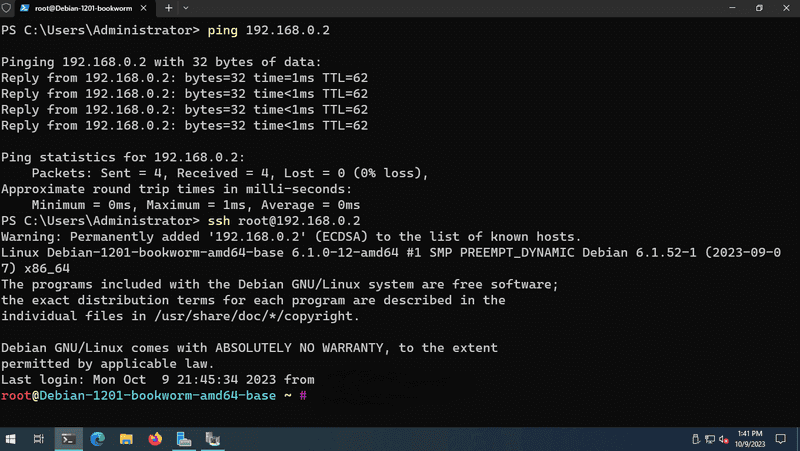
route -P add 192.168.0.0 mask 255.255.0.0 192.168.1.1 METRIC 1Now you should be able to ping your cloud server from your Windows machine and also log in via SSH for example:
To ensure that everything has been set up correctly, you can also check the routes for the cloud network with the following command:
Get-NetRoute -DestinationPrefix 192.168.0.0/16 | Format-TableThe output of the command should be the following:
